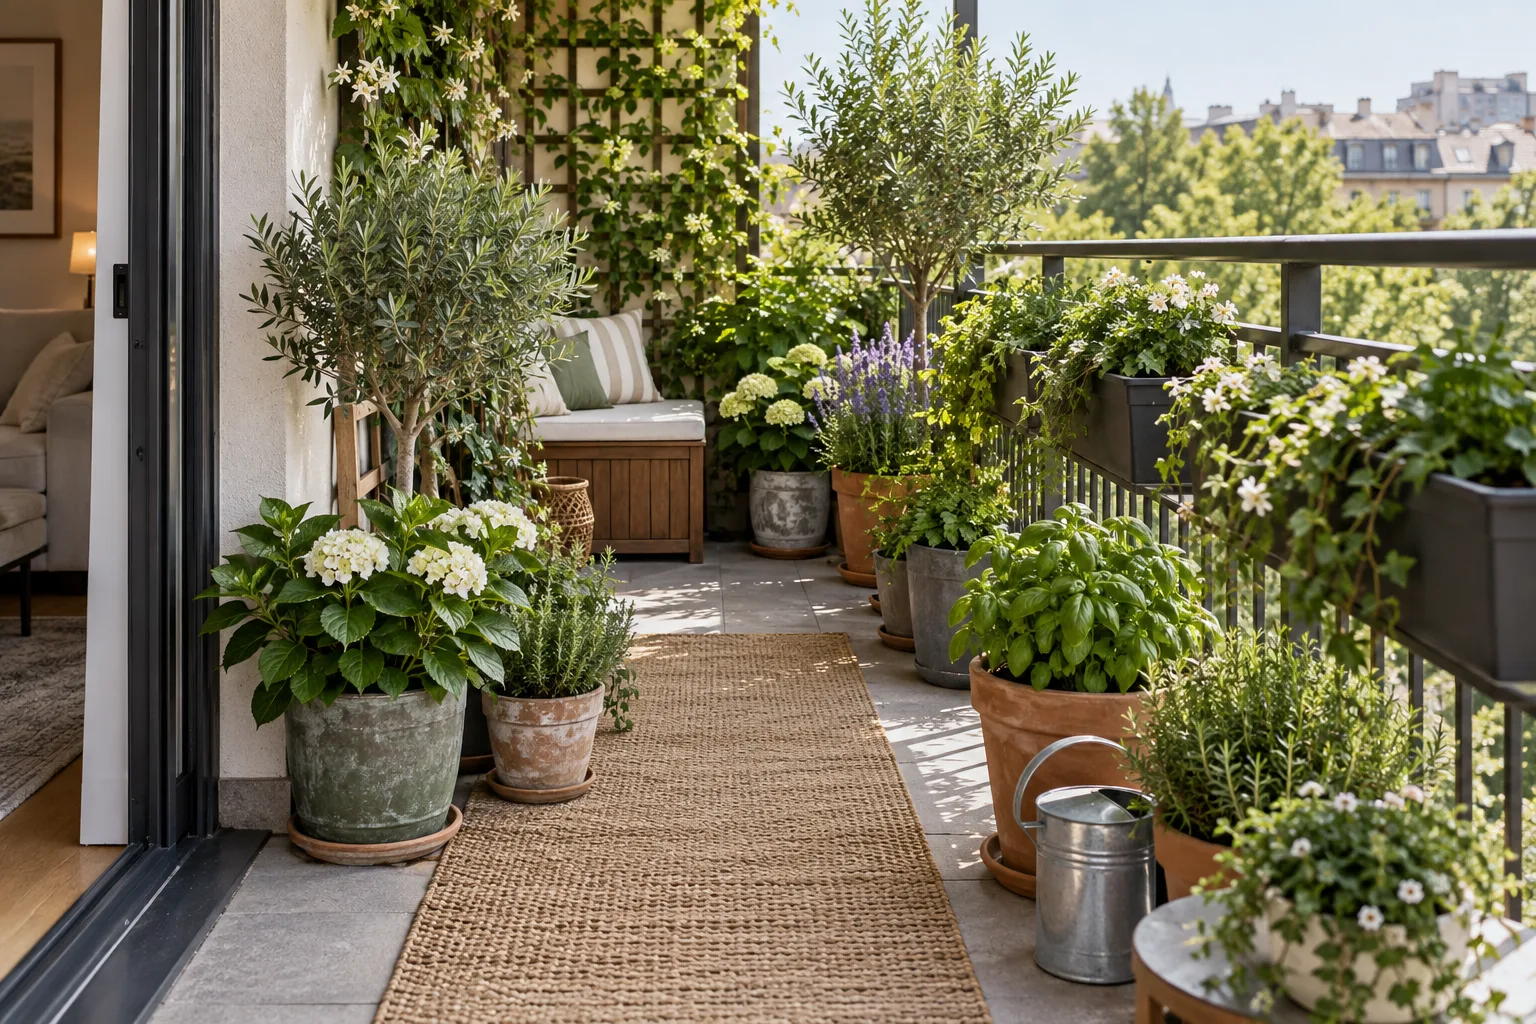
A balcony garden looks full when plants overlap visually at different heights, not when every patch of floor holds a pot. The distinction matters. A dense collection can look impressive for a week, then become difficult to water, clean and inspect as the plants mature. A layered garden uses fewer containers but gives each one a clear role.
The practical goal is a garden with a visible canopy, an open route from the door and enough access to reach every saucer. You should be able to remove one struggling plant without dismantling the entire balcony.
This approach is also kinder to the plants. Leaves dry more predictably after rain, stems have room to move without rubbing, and you can inspect new growth before a small pest problem spreads through an interlocked mass of foliage. The result feels generous because the plants are healthy and legible, not because the balcony is filled to capacity.
Start with a container limit
Before shopping, decide how many containers you can maintain comfortably. For many narrow rental balconies, four to seven well-chosen pots create more impact than fifteen small ones. The right number depends on usable floor area, weight, wind and how often you can water, not on how many seedlings fit in spring.
Mark the open route first. Keep the doorway, floor drain and any required exit clear. Then identify two or three planting zones. Each zone becomes one visual group, even if it contains several separate pots.
Use three height layers
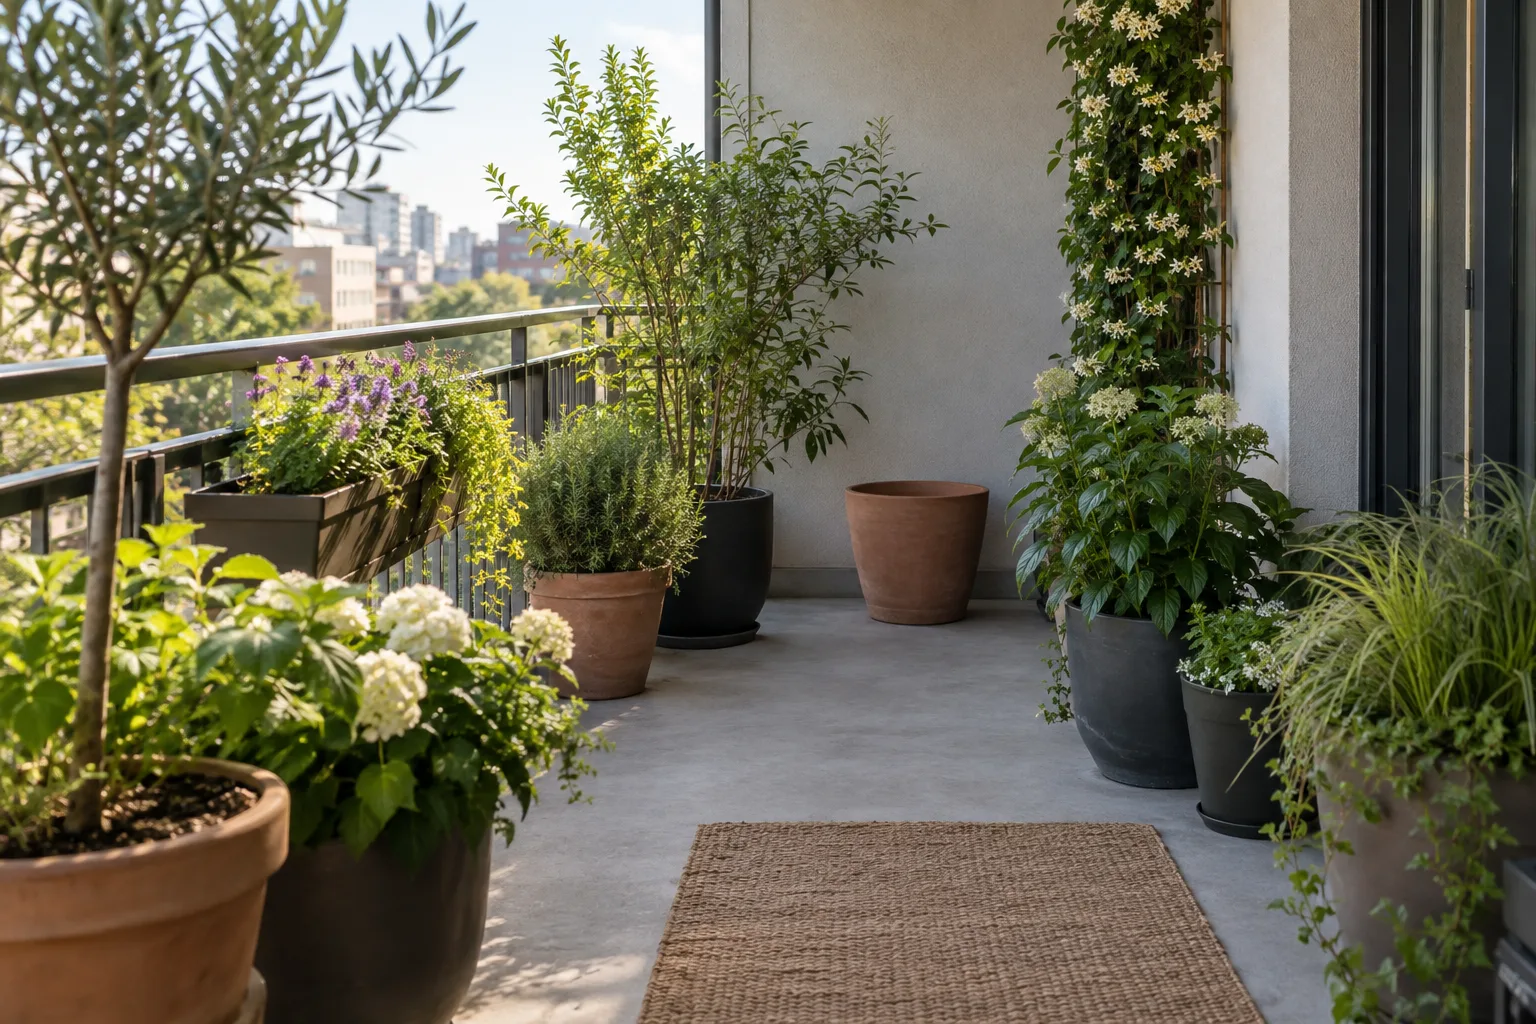
A simple tall-middle-low structure gives the eye more greenery without adding more floor coverage.
- Tall layer: one narrow ornamental grass, compact shrub, staked tomato or freestanding trellis near the building wall.
- Middle layer: bushy herbs, compact flowers, peppers or foliage plants that provide most of the visual mass.
- Low layer: salad greens, low herbs or one trailing plant kept safely inside the balcony edge.
You do not need all three plants in one pot. Separate containers are usually more forgiving because each plant can receive the soil, root space and watering it needs. Arrange the pots so their foliage reads as a layered group.
Make one plant the anchor
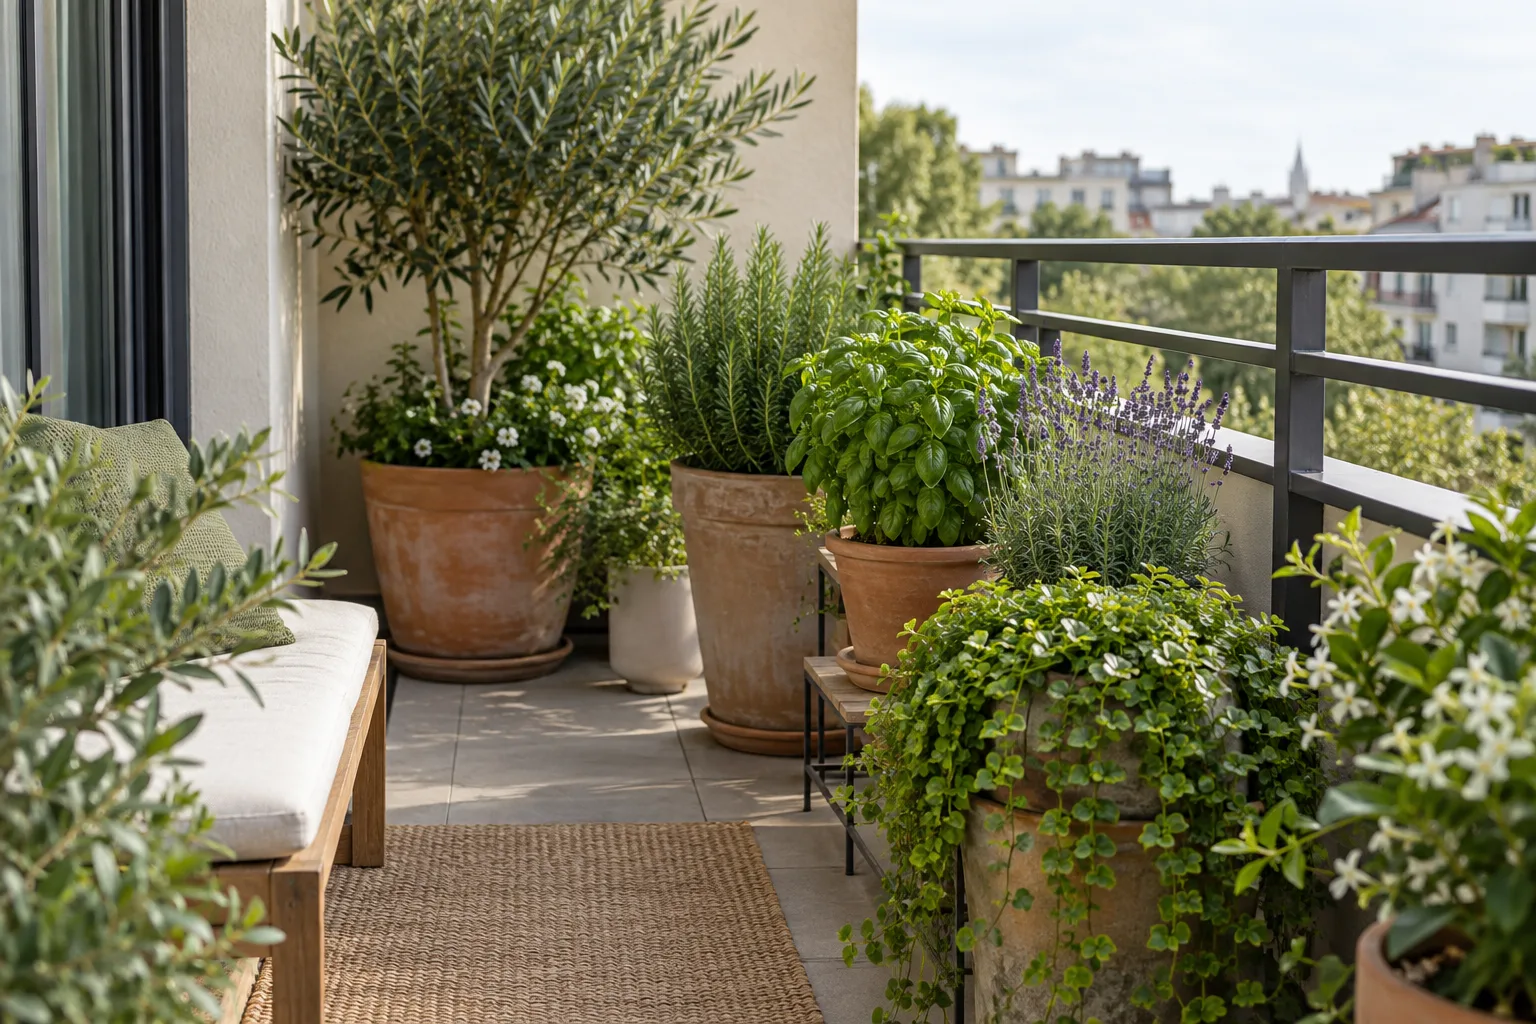
Choose one anchor for each planting zone. It might be a compact grass, rosemary, a patio tomato or a pot of purple salvia. The anchor is not necessarily the largest or most expensive plant; it is simply the shape that gives the group direction.
Place the anchor toward the back, usually near the wall. Add one rounder middle plant and one lower plant in front. Stop there and look from inside the apartment. If the group already reads as a complete shape, another pot will probably weaken it rather than improve it.
Repeat instead of collecting
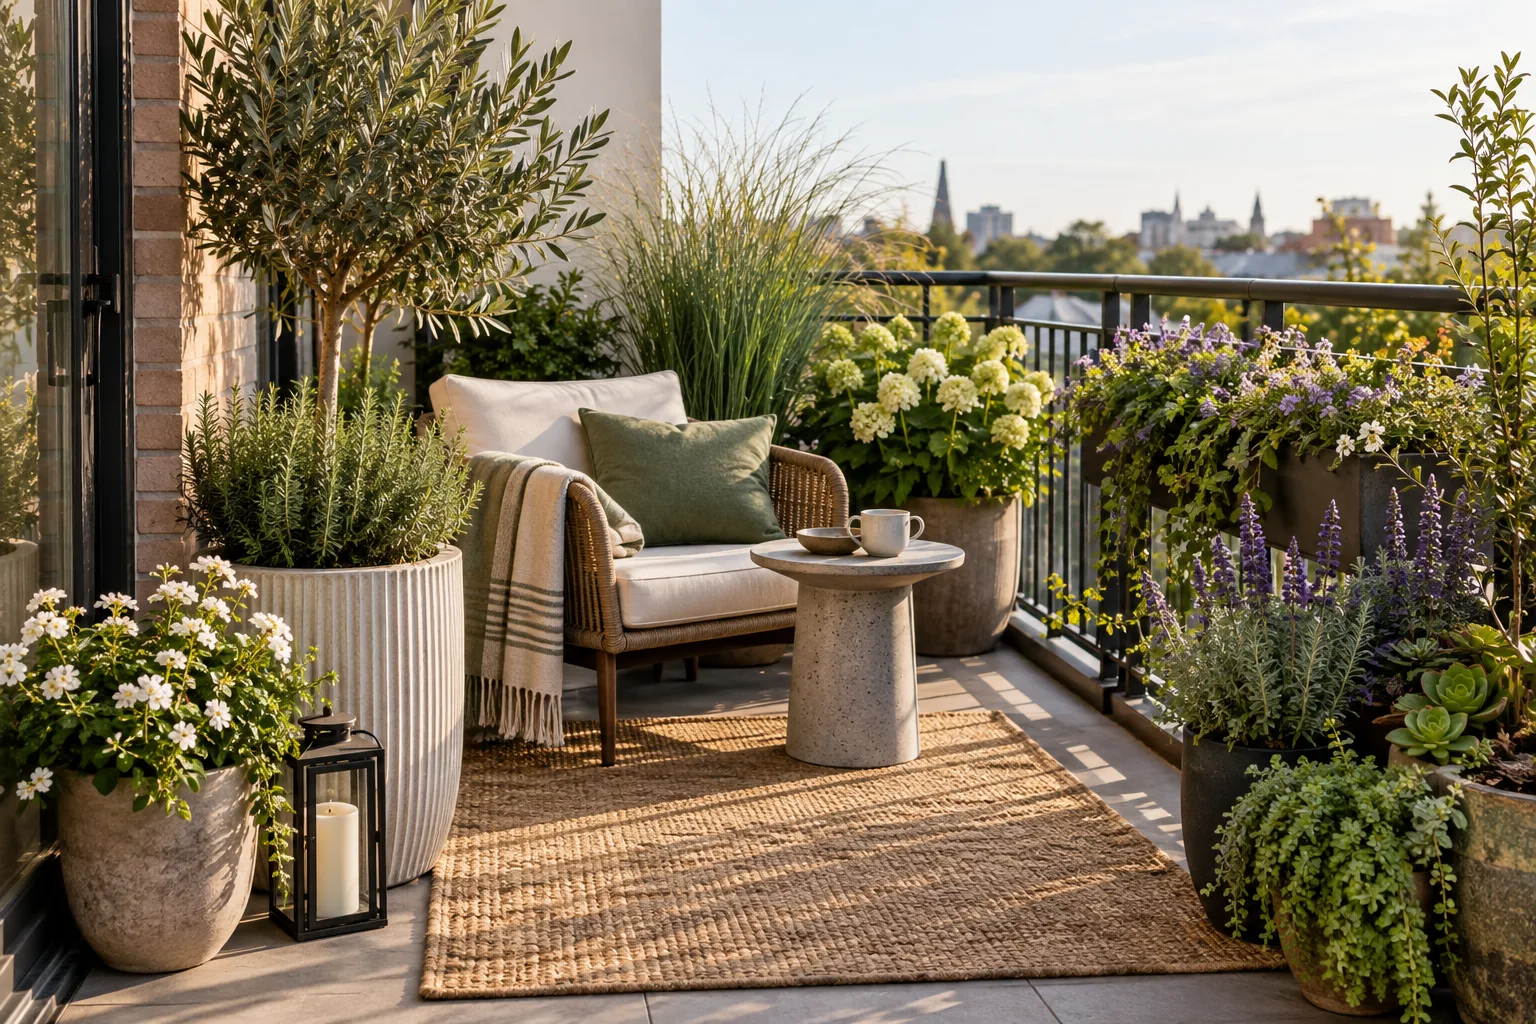
A balcony becomes visually noisy when every pot, leaf texture and flower color is different. Repetition creates calm. Repeat one or two plants across separate groups, such as the same rosemary, purple salvia or trailing nasturtium. Repeat a pot color or material as well.
This does not require buying a matching set. Three weathered terracotta pots can sit beside two dark resin containers if the plant palette repeats. The garden looks intentional while the containers still do different practical jobs.
Treat empty space as part of the garden
Leave visible floor between planting groups. A gap makes each group look larger, gives leaves room to move in the breeze and lets you reach the drain and saucers. Empty space also prevents the common effect where a balcony reads as pot storage instead of a garden.
Keep some railing visible too. Covering every section with foliage can reduce airflow and may create a sail in strong wind. It also makes pests and broken stems harder to notice from indoors.
Plan for mature width, not nursery size
Plants sold in spring are deceptive. A compact seedling may triple in width by midsummer. Check the mature spread on the plant label or a reliable growing guide, then allow leaves to approach and lightly overlap without pressing plants tightly together.
Crowding reduces airflow and makes it easier for moisture, pests and disease to go unnoticed. It also increases watering competition in mixed containers. If a combination looks finished on planting day, it is often already too full.
Choose plant combinations with compatible needs
A beautiful group only stays beautiful when its plants can be cared for together. Group containers by light and water demand, even when the plants are not sharing soil.
| Balcony condition | Layered combination | Care pattern |
|---|---|---|
| Sunny and relatively dry | Compact grass, rosemary, helichrysum and trailing nasturtium | Good drainage; check nasturtium more often |
| Sunny and regularly watered | Patio tomato, basil and dwarf marigold in separate pots | Even moisture and regular feeding |
| Part shade | Compact fuchsia, parsley, heuchera and trailing lobelia | Moist but drained potting mix |
| Bright shade | Fern, coleus and creeping Jenny | Protect from hot afternoon sun |
The combinations are visual templates, not rules. Confirm that each plant suits your climate and the actual direct-light hours on your balcony.
Use risers and shelves sparingly
A low riser can reveal a plant hidden behind a front pot. A sturdy two-tier stand can create height without adding another tall plant. Keep the heaviest container at floor level and place stands against the wall where they are less exposed to wind.
Avoid stacking loose crates, stools or overturned pots. Anything used as a riser should have a broad, level base and remain stable when the plants are wet and the wind changes direction.
Let containers share a tray, not necessarily soil
A large waterproof tray can visually unite three small pots and simplify watering. It also catches drainage before it reaches the balcony below. Use pot feet or empty the tray after watering so roots do not sit in standing water.
Separate pots make seasonal editing easy. When spring violas fade, remove that pot and replace it without disturbing the rosemary beside it. The group stays full because the structure, not one tightly planted container, does the work.
Edit the garden every two weeks
Stand inside the apartment and look outward. The view from the room is often more important than the view from the balcony. Ask four questions:
- Can I still see the shape of each group?
- Can I reach every pot, saucer and drain?
- Are any plants pressing hard against one another?
- Is the open route still obvious?
Prune damaged or crossing growth, rotate pots that lean toward the light and remove plants that are clearly failing. Editing is not a sign that the design went wrong. Container gardens change quickly, and regular subtraction is how a small space stays usable.
Common ways a balcony becomes overcrowded
- Buying one of every plant: variety without repetition creates visual clutter.
- Using only small pots: dozens of small containers need more watering and look busier than a few correctly sized ones.
- Filling the floor before adding height: a safe wall-side stand can replace several scattered pots.
- Ignoring mature size: spring gaps disappear naturally as plants grow.
- Hiding the drain: any layout that prevents routine cleaning is too dense.
- Adding décor to solve a plant-layout problem: another object rarely creates calm in a small footprint.
A simple formula for the first full-looking group
- Choose one anchor plant suited to your light.
- Add one middle plant with a contrasting leaf shape.
- Add one lower or trailing plant.
- Repeat one of those plants in a second group.
- Leave a visible gap between the groups.
- Wait two weeks before deciding that the balcony needs more.
If you are still deciding where the groups should go, begin with the five renter-friendly balcony layouts. Use the balcony sunlight test before selecting plants, and check the container size guide so each plant has enough root room.
Finish the arrangement
Start with one of the five renter-friendly layouts, then choose plants that match the space using the condition checklist.
Use a weekly editing pass, not another pot
When a balcony begins to look crowded, adding a decorative container usually makes the problem worse. Once a week, stand at the doorway and ask three questions: can I reach every plant without moving something, can air move between the leaves, and is there one clear place for watering tools? If the answer is no, remove or regroup before buying anything else.
Keep visual repetition intentional. Two or three containers in one material or color read as a calm group; one unrelated pot in every gap reads as clutter. Repeating a plant at different heights can make the space look planted without multiplying the number of varieties you have to water and diagnose. Put the tallest or heaviest containers toward the wall, then step down in height as the eye moves outward.
Give one plant or small group the role of focal point and let the remaining containers support it. A balcony does not need to show every plant from every angle. Open floor and visible railing are useful negative space: they make the garden safer to use and make the planted areas look more deliberate.
Sources
- Oregon State University Extension: Layered container design and mature plant size
- Utah State University Extension: Container size and thriller-filler-spiller structure
- University of Minnesota Extension: Container gardening in small spaces
Keep containers within your balcony’s permitted load and follow your building’s rules for plant stands, screens and railing attachments.