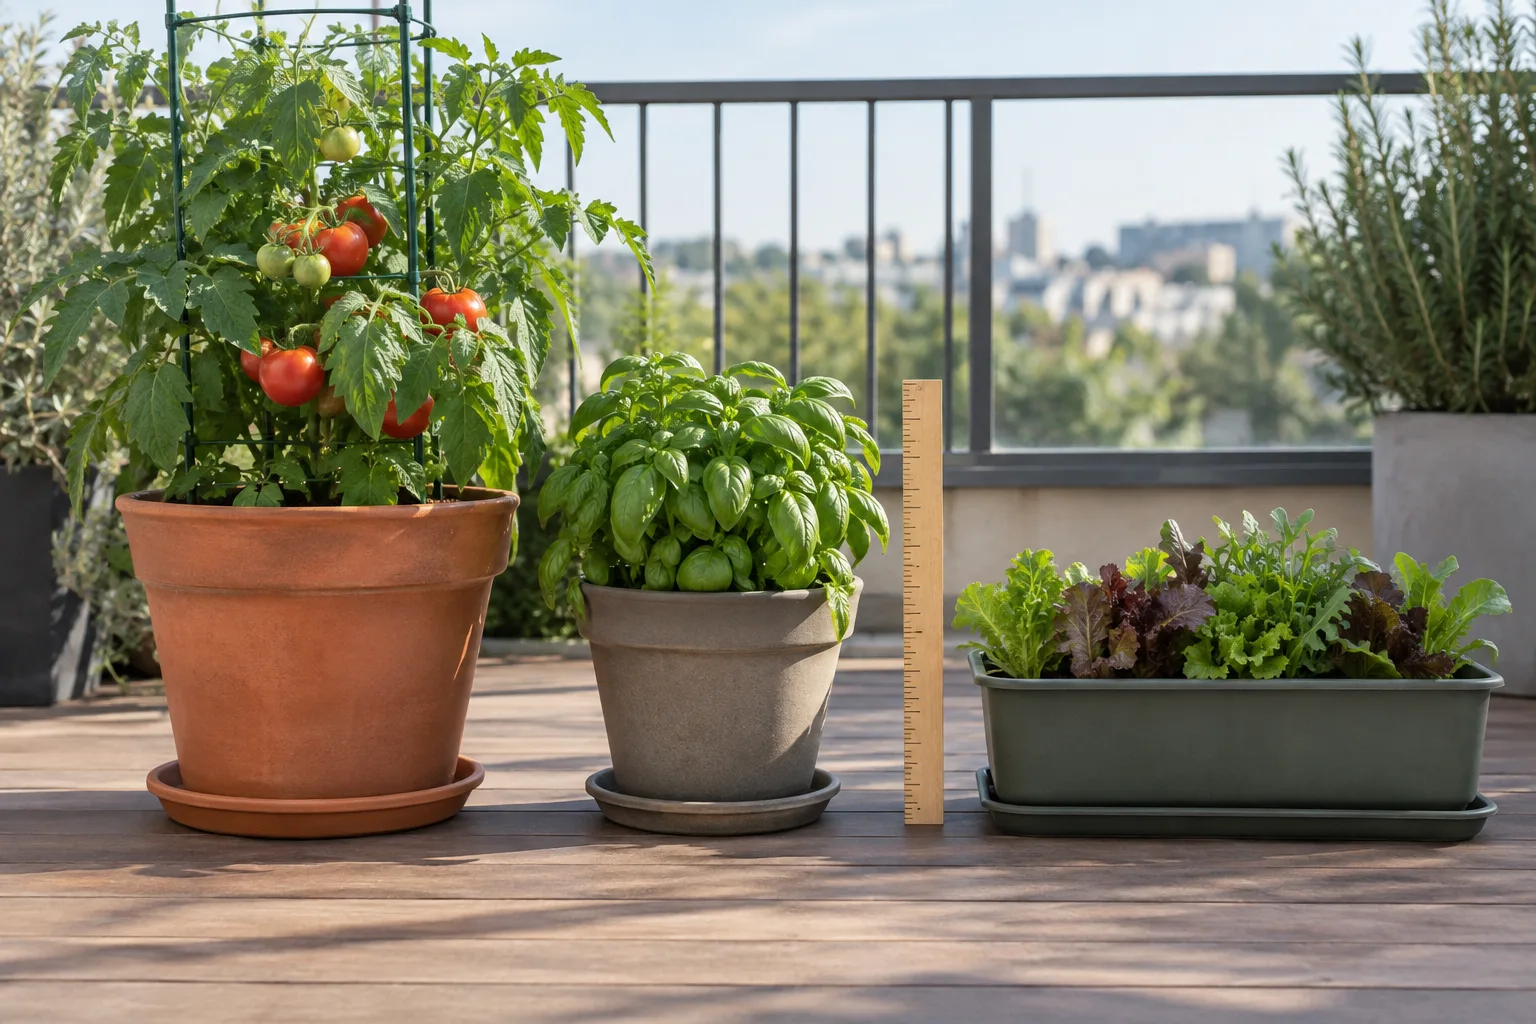
On a balcony, the planter is part of the safety plan. Its filled weight, drainage, material, and footprint affect the floor, the neighbor below, and the work of moving it later. This guide compares those trade-offs and gives conservative starting sizes for common balcony crops.
This guide covers what makes a good balcony planter; weight, drainage, size, and material; and which types earn their space in a small, rule-bound rental. It assumes you’ve already checked your building’s rules and thought about load limits. If you haven’t, start with the basics of setting up a balcony garden, then come back here to choose containers.
Weight comes first, always
Before comparing materials or looks, understand the one number that changes everything: a planter’s weight when the soil is wet. Dry potting mix is light. Freshly watered potting mix roughly doubles in weight, and the container itself adds more on top.
| Container size | Approx. wet weight (soil + pot) | Everyday comparison |
|---|---|---|
| 8 in (20 cm) pot | 9 to 15 lb (4 to 7 kg) | A bag of groceries |
| 12 in (30 cm) pot | 22 to 35 lb (10 to 16 kg) | A packed carry-on suitcase |
| 18 in (45 cm) pot | 55 to 90 lb (25 to 40 kg) | A checked suitcase at the limit |
| Large trough / half-barrel | 110 to 200+ lb (50 to 90+ kg) | An adult person |
These are rough ranges; heavier pots (terracotta, ceramic, concrete) sit at the top of each range, fabric and resin at the bottom. The point isn’t precision; it’s that a cluster of large wet planters can quietly add up to several hundred pounds.
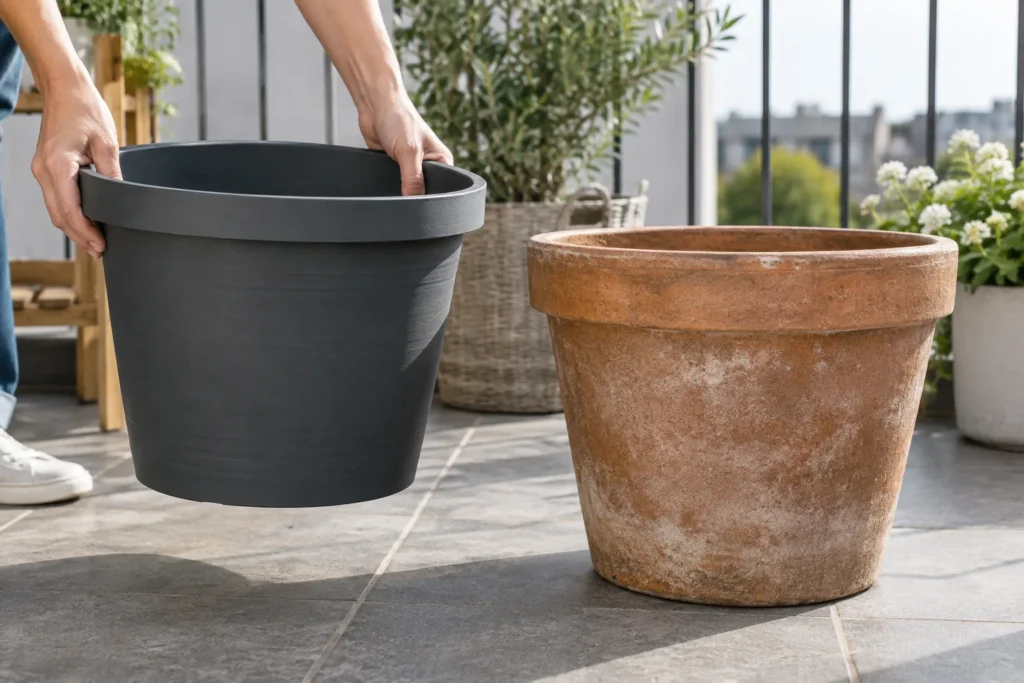
Practical rules that don’t require knowing your balcony’s exact load rating:
- Keep the heaviest containers against the building wall, where the structure is strongest; never clustered mid-span or along the outer edge.
- Prefer several medium containers over one giant one. They’re easier to move, easier on the floor, and one failure doesn’t take out the whole garden.
- If you’re considering anything trough-sized or larger, ask your landlord or strata about load capacity first.
Container materials compared
Fabric grow bags; the renter’s best friend
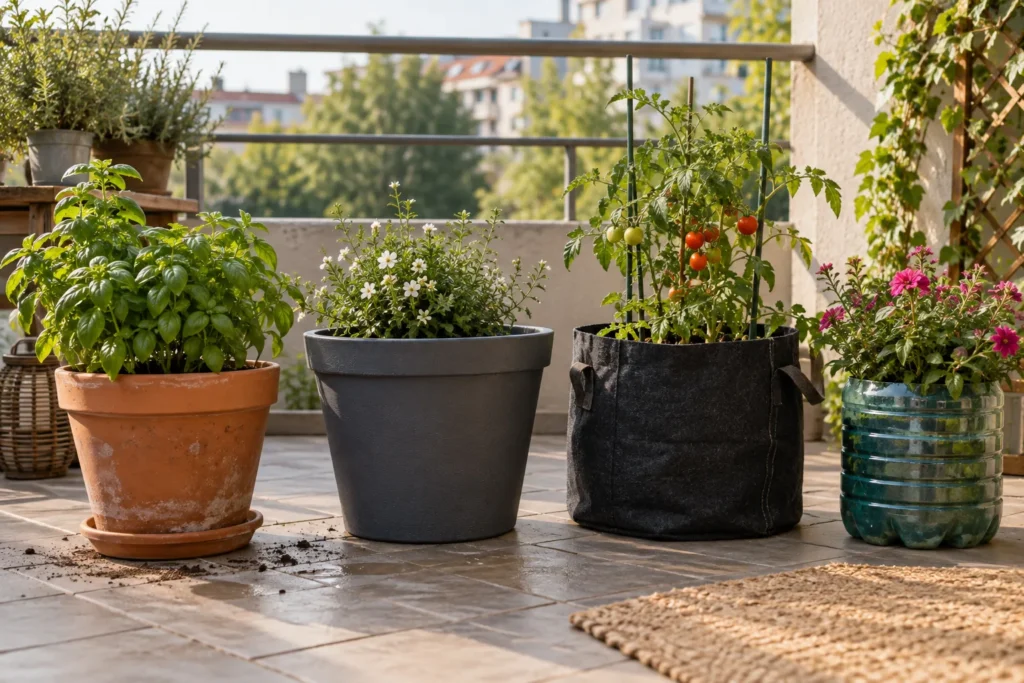
Cheap, extremely light, well-draining, and they fold flat into a drawer over winter or when you move. Roots “air-prune” at the fabric edge instead of circling, which plants genuinely like. The trade-offs: they dry out faster than rigid pots, they look casual rather than polished, and they need a tray underneath because they weep water through the sides as well as the base. For herbs, greens, and even tomatoes on a rental balcony, they’re hard to beat on function per dollar.
Plastic and resin; the practical default
Light, cheap to mid-priced, holds moisture well, survives being dropped. Modern resin pots imitate terracotta or stone convincingly at a fraction of the weight; often the best choice when you want the look without the weight. Weaknesses: thin plastic gets brittle after a few years of sun, and very light pots can blow over in wind. Choose thicker-walled pots with a wide base for anything tall.
Terracotta and ceramic; beautiful, heavy, thirsty
Terracotta breathes, which roots like, and it looks better every year. But it’s heavy before you add soil, it wicks moisture out of the pot (more watering in wind), and it can crack if left out through freeze-thaw winters. On a small balcony, treat terracotta as an accent; one or two favorite pots near the wall; not the whole fleet.
Self-watering containers; worth it for thirsty crops
A reservoir under the soil lets plants drink between waterings, which smooths out hot weekends and windy weeks; the two things that kill the most balcony plants. They cost more and add weight (the reservoir is water, after all), so use them selectively: tomatoes, peppers, and anything that wilts by evening. One warning: in rainy climates, buy ones with an overflow hole, or the reservoir becomes a root-drowning swamp.
What to skip
- Concrete and cast stone: the weight problem, concentrated.
- Decorative pots without drainage holes: fine as a sleeve around a plastic nursery pot, never for planting into directly.
- Cheap “complete balcony garden systems”: you’re paying for packaging around pots you could buy separately for less.
- Anything designed to hook over the railing without a locking bracket: and even proper railing planters only if your building explicitly allows them.
Size: the mistake almost every beginner makes
Beginners buy pots that are too small, because small pots are cheap and a seedling looks lost in a big one. Then the plant’s roots fill the pot by July, the soil dries out by noon every day, and the harvest is a disappointment. Minimum useful sizes:
| Plant | Minimum container |
|---|---|
| Most herbs (mint, parsley, chives, thyme) | 6 to 8 in (15 to 20 cm) wide |
| Lettuce and salad greens | 8 to 10 in (20 to 25 cm) wide and deep |
| Bush beans, compact peppers | 10 to 12 in (25 to 30 cm) |
| Cherry tomato (patio variety) | 14 to 18 in (35 to 45 cm), ~5 gal (20 L) |
| Rosemary, small shrubs | 12 in+ (30 cm+) |
When torn between two sizes, take the bigger one; with one balcony exception: if the bigger pot pushes you into the heavy-container weight class, take two smaller pots instead.
Drainage: the non-negotiable feature
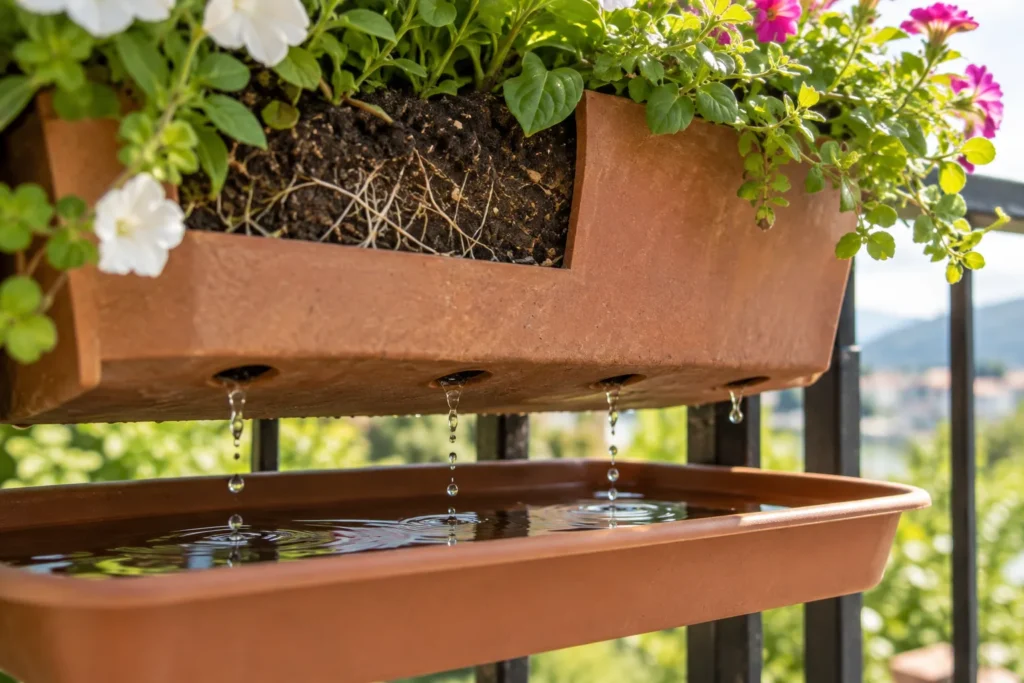
Every planting container needs drainage holes; and on a balcony, every container also needs something to catch what drains. A saucer sized to the pot, or a tray under a group of pots, protects your floor and keeps water off the balcony below. Two details people miss:
- Saucer size matters. A saucer barely wider than the pot’s base overflows on the first thorough watering. Go one size up.
- Pot feet help in wet climates. Small risers under the pot keep the base out of standing saucer water, so roots don’t sit in it after rain.
Railing planters: read the rules before the reviews
Railing planters are the most space-efficient containers a balcony can have; and the most regulated. Many buildings prohibit anything hanging on the outside of the railing outright, and for good reason: a planter falling from height is genuinely dangerous. Before buying one:
- Check your lease or building rules for railing attachments specifically; this is one of the most commonly regulated items.
- If allowed, hang planters on the inside of the railing wherever possible.
- Use planters with locking or bolt-adjustable brackets sized to your railing; never friction-fit hooks.
- Choose models with built-in water reservoirs or inner trays, so they never drip on whoever is below.
Going vertical when the floor runs out
On a very small balcony, the floor fills up after five or six pots; but the walls and corners usually don’t. Vertical options that work in rentals, in rough order of usefulness:
- A freestanding plant stand or ladder shelf. No drilling, no rules problem, and it triples the number of plants the same floor space can hold. Put it in a corner or against the wall so wind can’t rock it, and keep the heaviest pots on the bottom shelf.
- Stacking or tiered planters. Good for strawberries and herbs. Check that each tier drains into the one below rather than out the sides.
- Pocket panels and wall hangers: only if your building allows wall attachments, which many don’t. A freestanding trellis leaning in a corner does most of the same job without touching the wall.
Two cautions. First, vertical setups concentrate weight on a small footprint; a loaded four-shelf stand is one more reason to stay near the building wall. Second, tall structures catch wind like a sail; if your balcony is exposed, keep vertical gardening below railing height.
A sensible starter set
For a typical small rental balcony, this covers a full first season without a weight or rules problem:
- 2 to 3 fabric grow bags (8 to 12 in / 20 to 30 cm) with a tray under them; herbs and greens
- 1 to 2 resin or thick plastic pots (10 to 12 in / 25 to 30 cm) with saucers; beans, flowers, or a pepper
- 1 self-watering container (~5 gal / 20 L): the tomato, if your light allows it
- Optional: one terracotta pot you like, near the wall
Everything on that list is light enough to carry up stairs, cheap enough to leave behind if you move, and safe on any balcony that can hold patio furniture.
Winter and moving day: the renter’s planter test
Two moments reveal whether you bought the right containers, and neither happens in summer.
Winter. In cold climates, water left in pots freezes, expands, and cracks rigid containers; terracotta and cheap ceramic first. Before hard frost: empty pots you’re not overwintering plants in, store what folds or stacks (fabric bags shine here), and lift what stays outdoors onto pot feet so it isn’t sitting in ice. Resin and thick plastic usually survive winters outside; terracotta often doesn’t.
Moving day. Every renter’s garden eventually goes down the stairs it came up. A collection of fabric bags and medium resin pots moves in two car trips; a half-barrel full of soil doesn’t move at all; it gets abandoned, argued over, or paid for. Buying light and modular isn’t just about the balcony’s load limit; it’s about keeping your garden portable, because renting means your garden has to be.
Where to save and where to spend
A first-season container budget goes further when it’s uneven; cheap where cheap works, spent where it changes outcomes.
- Save on: fabric grow bags (the cheap ones work), basic plastic pots for herbs and greens, saucers and trays, and anything you’re still experimenting with. Dollar-store saucers do the same job as garden-center ones.
- Spend on: the one self-watering container for your thirstiest crop, a locking bracket if you’re allowed a railing planter (never cheap out on the thing holding weight over a drop), and a plant stand sturdy enough not to rock in wind.
- Skip entirely in year one: matching designer pot sets. Buy pots as plants earn them; a matched set bought upfront locks in sizes before you know what grows well on your balcony.
Planter choices that create avoidable problems
- Buying for looks first. The gorgeous glazed pot with no drainage hole becomes a plant coffin by August.
- One giant statement planter. Maximum weight, minimum flexibility, and you can’t move it to chase the sun.
- Tall pots in wind. Anything tall and narrow tips in gusts; wide bases or wall corners only.
- Forgetting the move-out day. Renters eventually carry every pot back down the stairs. Buy with that day in mind.
- Skipping saucers to save a few dollars. The cheapest item in the whole setup prevents the most expensive problem; a neighbor complaint.
Choose the first containers
Before you buy anything, check how much direct sun your balcony gets. Sun hours decide how big and thirsty your plants will be, which in turn decides how large and how many containers you need. Measuring first stops you from buying a fleet of big self-watering pots for a shady balcony that only wants a few herb pots.
Then start small: a couple of fabric bags and one or two medium resin pots with saucers will grow a full first season. Add a self-watering container and a plant stand once you know what your balcony grows well. Our guides on measuring balcony sunlight and starting a balcony garden walk through both steps.
Use the measurements
Return to the first-season plan, or compare reservoir weight and drainage in the self-watering planter guide.
Sizing up a container often means moving an existing plant into it; see our guide to repotting a balcony plant without killing it.