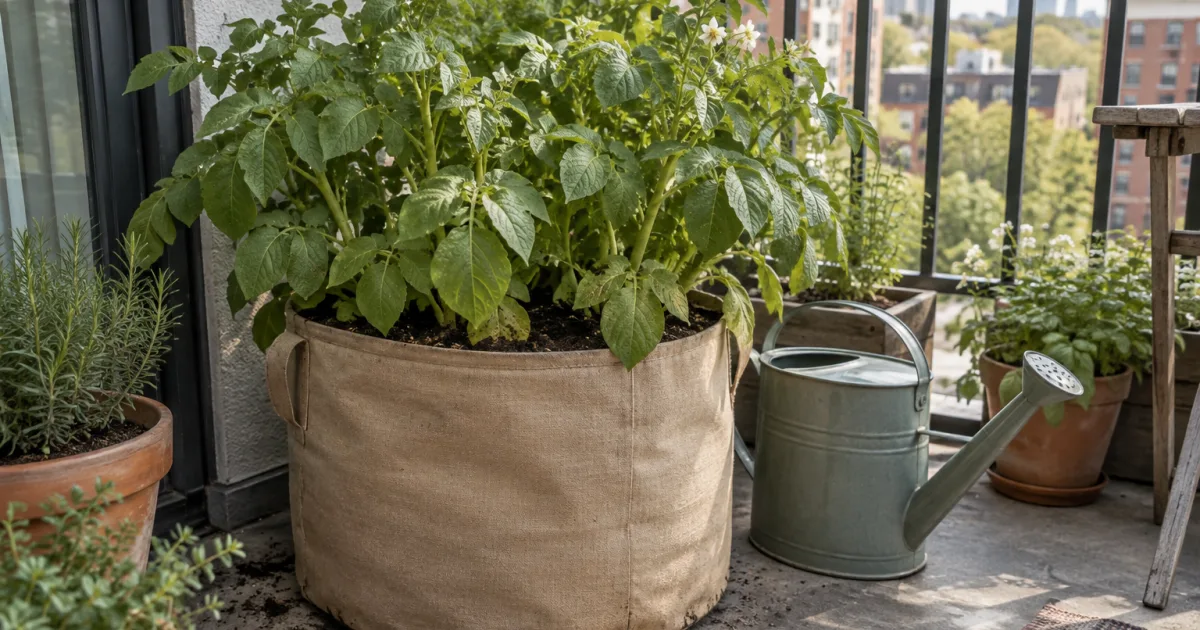
Potatoes rarely make anyone’s shortlist of balcony crops, and that’s mostly a space assumption people never bother to check. A potato plant doesn’t need a garden bed to produce a real harvest; it needs a deep enough container, a technique called hilling that most vegetables never require, and patience through a growing season that runs longer than most container crops. In exchange, a single well-managed container can produce several pounds of potatoes, which is a genuinely different scale of return than most balcony vegetables offer per square foot of floor space.
This guide covers what’s specific to growing potatoes in a container instead of a garden row: how big that container needs to be, what to plant (seed potatoes, not the ones from your kitchen counter), how hilling works and why it’s the technique that makes or breaks a container harvest, and how to tell when it’s time to dump the container out and see what you grew.
How big a container do potatoes actually need?
Potatoes want depth more than almost anything else grown on a balcony, since the technique that produces a real harvest, hilling, depends on having room to keep adding soil as the plant grows. A container around 2 to 3 feet tall with a 10 to 15 gallon capacity is the sweet spot: fabric grow bags, garbage bins with drainage holes drilled in, and large plastic totes all work, as long as they’re opaque, since light reaching developing tubers causes the same greening problem covered further down. Avoid going taller than that range; an overly deep container dries unevenly, with the top drying out while the bottom stays soggy, and that unevenness is harder to manage than it’s worth. For material and drainage considerations that apply to any container on a balcony, see our container size guide.
Width matters less than depth here, but a wider container does let you plant more than one seed potato per container, spaced roughly a foot apart. On a balcony where floor space is the real constraint, a single tall, narrower grow bag per plant is often the more practical footprint than one wide, shallow container holding several plants at a shallower depth that won’t support proper hilling anyway.
| Container type | Drainage | Heat buildup | Best for |
|---|---|---|---|
| Fabric grow bag | Excellent, breathable sides | Low | Most balconies; easiest to tip out at harvest |
| Plastic bin or tote | Needs holes drilled | Higher if dark-colored | Renters reusing what’s on hand |
| Wood or fabric-lined planter | Good | Low to moderate | Balconies where appearance matters |
Container color is worth a second thought on a hot, sunny balcony: a dark plastic bin sitting in direct afternoon sun heats the soil noticeably more than a light-colored bag or a fabric container, and overheated soil can stress roots and slow tuber formation during the hottest stretch of summer. If your only option is a dark container and your balcony runs hot, see our guide to plants for hot, sunny balconies for other ways to manage heat around containers, or simply shift potatoes to the mildest full-sun spot available instead of the one that gets the most intense afternoon light.
Is your balcony sturdy enough for a potato container?
This is the one question worth answering honestly before committing floor space to potatoes for an entire season. A 15 to 20 gallon container falls in the same weight class as the largest planters covered in our container size guide, roughly 55 to 90 pounds once the soil is watered, and a full 20-gallon bag can run higher than that. Unlike a smaller herb pot, that weight sits in one concentrated spot on the floor for the entire 70 to 120 day growing season, not something you’re moving around week to week.
Potatoes are a heavier, longer, and more floor-space-intensive commitment than most of the crops on this site, herbs and strawberries in particular, in exchange for a fun harvest more than an especially calorie-dense one for the space used. That’s not a reason to skip them, but it is a reason to place the container against a load-bearing wall or in a corner near the building’s structure rather than out on an unsupported overhang, and to check your building’s posted weight limits if you have any doubt, the same balcony-load caution that applies to any large container on this site.
What should I plant, seed potatoes or grocery potatoes?
Seed potatoes, not the potatoes sitting in your kitchen. Certified seed potatoes are grown specifically for planting and are checked for the diseases that can quietly ruin a container’s worth of soil for future growing; grocery store potatoes are more likely to carry those diseases and are frequently treated with a sprout inhibitor that works against you before the plant even gets started. Seed potatoes are inexpensive and available at garden centers and through mail order in early spring, which is also when they should go in the container.
Larger seed potatoes get cut into pieces before planting, each piece with at least one or two eyes, the small indentations that sprout into the plant. Let cut pieces sit at room temperature for a couple of days before planting so the cut surface can callus over; planting a freshly cut, exposed piece straight into moist soil makes it more likely to rot before it has a chance to sprout. Small seed potatoes, about the size of a golf ball or smaller, can usually go in whole without cutting.
Garden centers typically stock seed potatoes for only a few weeks in early spring, and mail-order seed companies sell out of the more distinctive varieties well before then, so ordering in late winter is worth doing if you have a specific variety in mind rather than waiting to see what’s left on the shelf.
Which variety should I choose for a container?
Potato varieties fall into three broad maturity groups, and picking one is mostly about how long you’re willing to dedicate the container. Early-season varieties, sometimes labeled “new potatoes,” mature in about 75 to 90 days and are ready by early summer if planted in spring; they’re less likely to run into blight or pest pressure simply because they’re out of the ground sooner, though they don’t store as long afterward. Yukon Gold and Red Norland are common early varieties. Mid-season varieties take roughly 95 to 110 days; Red Pontiac and Kennebec are typical examples. Late-season, or “main crop,” varieties need 120 to 135 days but store the longest afterward and tend to be the better choice for baking and roasting; Russet Burbank is the classic late variety most people already recognize from the grocery store.
For a single balcony container, an early or mid-season variety is usually the more forgiving choice: it ties up the container for less of the season and gets you to harvest before summer heat stress becomes a factor. Save a late-season variety for a container you’re comfortable dedicating to potatoes well into fall.
How deep do I plant them, and what is hilling?
Start with 6 to 8 inches of potting mix in the bottom of the container, set the seed potato pieces cut side down and spaced about a foot apart, then cover with another 6 inches of soil. That’s the planting depth. Hilling is what happens after the plant comes up, and it’s the one technique that makes container potato growing genuinely different from growing almost anything else in a pot.
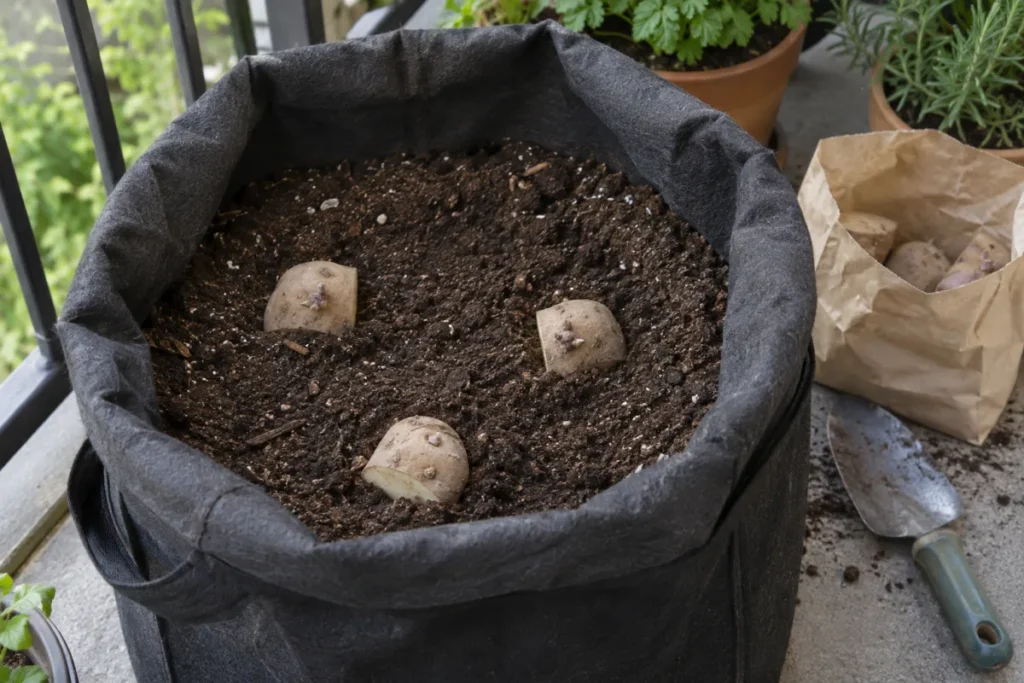
Potatoes form above where the original seed piece was planted, along the buried portion of the stem, not below it the way most root vegetables grow. As the plant grows and produces new foliage, add more soil around the stem, leaving roughly the top 6 inches of foliage exposed at any given time, and repeat every couple of weeks as the plant keeps growing taller. Each round of added soil buries more stem, and each buried section of stem is where a new flush of tubers can form. Keep hilling until the soil reaches the top of the container; from there, let the plant grow and mature on its own.
- Skipping hilling entirely is the single biggest reason a container harvest comes up disappointing; without it, the plant only has the original planting depth to form tubers in.
- Adding all the soil at once instead of gradually buries the plant’s growing point and can smother it before it’s established enough to push through.
- Letting developing tubers reach light anywhere near the top of the soil line turns their skin green, a sign of solanine, a natural compound that’s mildly toxic and gives the flesh a bitter taste. Keep tubers covered.
Sun, soil, and watering
Potatoes want a full-sun spot, six or more hours of direct light, the same baseline most fruiting balcony vegetables need; less than that produces a smaller plant and a smaller harvest, not a failed one. Growth also slows noticeably once nighttime soil temperatures routinely sit above roughly 80°F, one more reason an early or mid-season variety planted in spring tends to outperform one still filling out containers in the hottest stretch of summer.
A standard potting mix works well; avoid garden soil or anything that compacts heavily, since loose soil is what makes it possible for developing tubers to expand and for you to hill without fighting a dense, brick-like mix. Our potting mix versus garden soil guide covers why the two aren’t interchangeable in a container. Potatoes also prefer more acidic soil than most balcony vegetables, roughly pH 4.8 to 5.5, which happens to be one of the few reliable ways to reduce scab, a cosmetic skin blemish that doesn’t affect the potato’s edibility but does affect how it looks. A potting mix labeled for acid-loving plants, the kind sold for blueberries or azaleas, gets you into that range without extra amending; a standard all-purpose mix runs a bit higher in pH but still produces a perfectly good harvest if scab-free skin isn’t a priority.
Consistent moisture matters most while the plant is actively flowering and forming tubers; a container that dries out completely during that window tends to produce a smaller, more uneven harvest than one kept evenly moist. A deep container also means the surface can look dry while soil lower down still holds moisture, so check by feel a couple of inches down rather than judging by the surface alone, the same watering-by-feel approach covered in our watering guide for container plants.
How do I know when potatoes are ready to harvest?
The plant tells you. Once the foliage on top has yellowed and started dying back, usually somewhere between 70 and 120 days after planting depending on the variety, the potatoes underneath are mature and ready to come out; a hard frost in fall is the other natural cutoff if the plant is still going. If you’d rather harvest a few smaller, thinner-skinned potatoes early instead of waiting for the full harvest, that’s an option too; just reach into the soil near the edge of the container and feel around without disturbing the whole plant.
Once the foliage has mostly died back, stop watering for the final two to three weeks before harvest instead of continuing on the same schedule. Cutting water at that point lets the skins toughen up, which matters more than it sounds like it should: thin-skinned potatoes pulled from consistently wet soil bruise and spoil faster in storage than ones that got a dry stretch to firm up first.
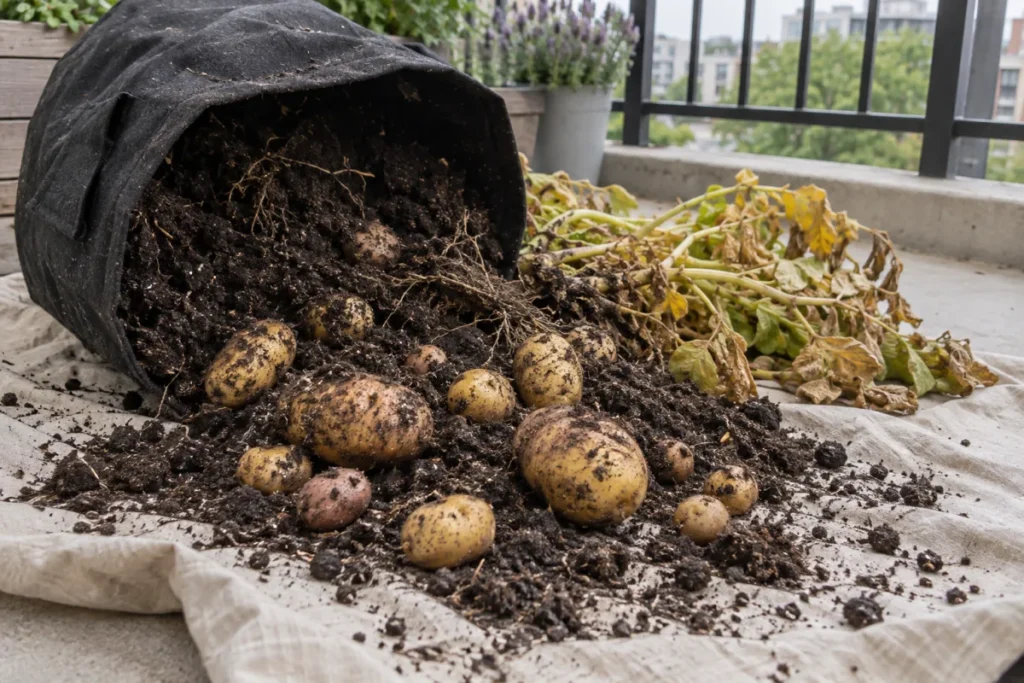
For the full harvest, the easiest method by far is the one advantage a container has over a garden row: spread a tarp on the balcony floor, tip the container over, and sort through the soil by hand instead of digging blind with a fork and risking spearing half your harvest. Handle the potatoes gently, since bruised skin shortens how long they’ll keep in storage, and brush off loose soil rather than washing them if you plan to store them for more than a few days; potatoes stored unwashed in a cool, dark, humid spot keep noticeably longer than ones that went straight from the container to a rinse under the tap.
How should I store what I harvest?
Potatoes keep longest somewhere cool, dark, and humid, ideally 45 to 55°F, in a container that still breathes, such as a paper bag, cardboard box, or mesh produce bag rather than a sealed plastic bag or container. A closet, a cool pantry, or an unheated storage spot all work better than a kitchen counter, which is both too warm and too bright for long-term storage. Refrigerator temperatures run colder than ideal and can convert some of the potato’s starches to sugar over time, changing the texture and flavor, though a fridge is a reasonable short-term option if it’s simply the coolest, darkest spot available in a small apartment.
A well-hilled container generally yields somewhere between two and five times the weight of the seed potatoes you planted, though that range depends heavily on variety, container size, and how consistent the watering was through the season; it’s a wide enough range that two people growing the same variety in identical containers can still end up with noticeably different results. Once the container is empty, the spent soil isn’t worth reusing for potatoes again the following year, since it can carry over the same diseases certified seed potatoes are bred to avoid; work it into soil for a different crop instead, or refresh it entirely before planting potatoes in that container again.