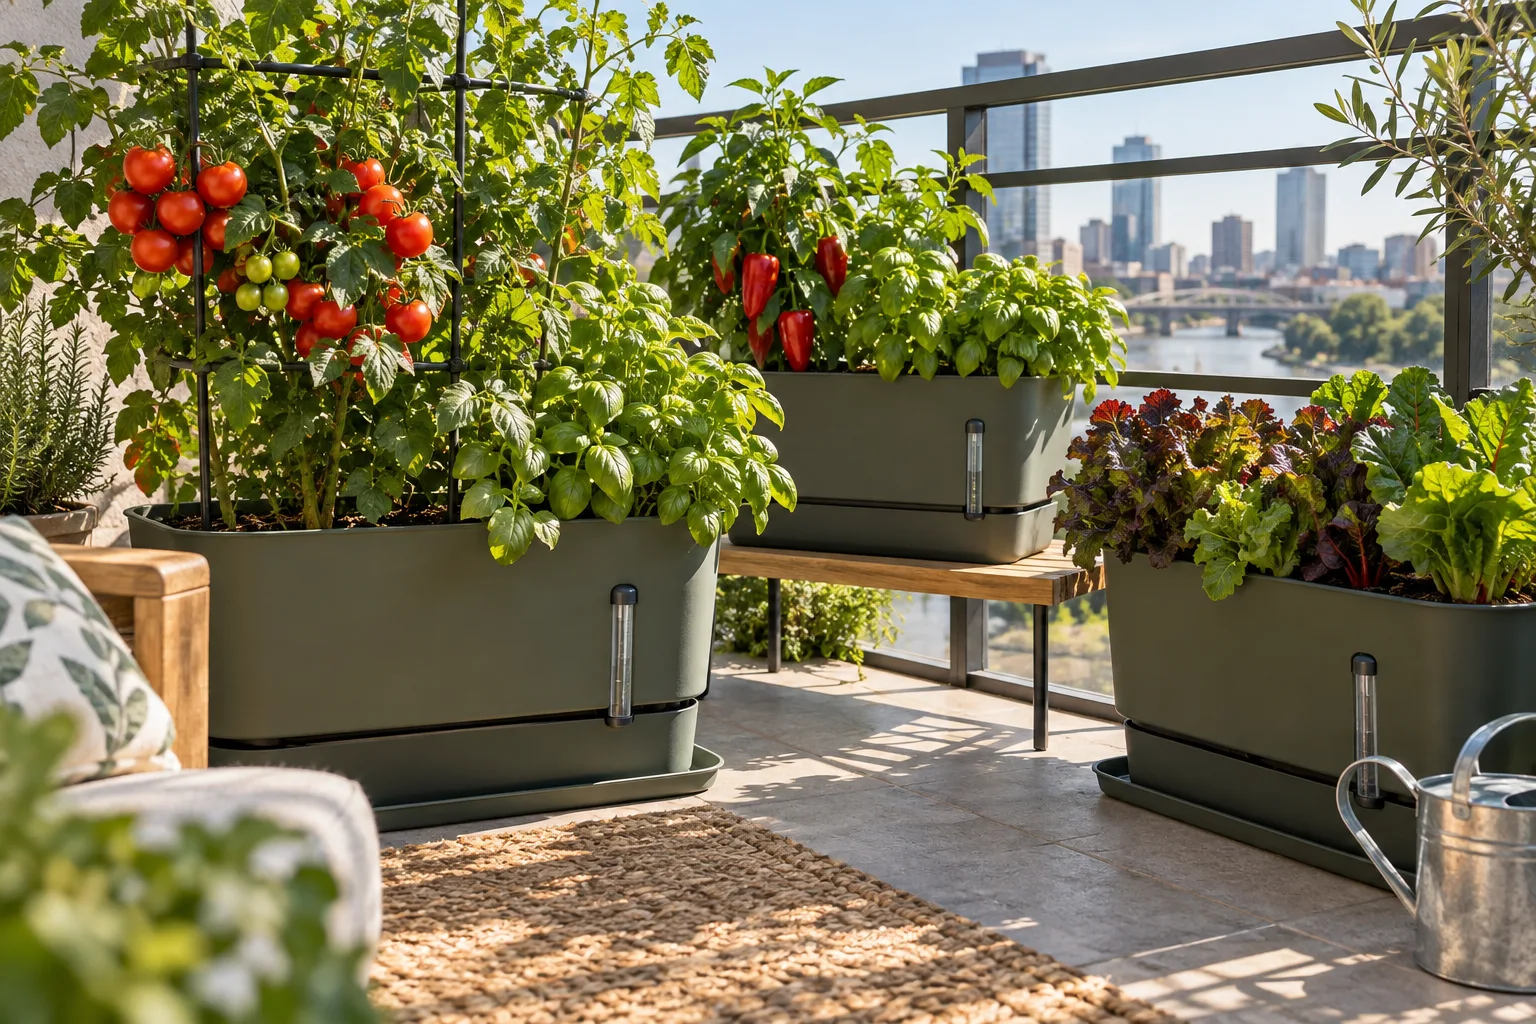
A self-watering planter uses a reservoir beneath the potting mix to keep moisture available between refills. Water moves upward through a wick or columns of mix, while an overflow hole prevents the reservoir from rising into the root zone. The system is useful only when the potting mix, overflow, and refill routine work together. For the research behind whether that reservoir actually helps roots, see do self-watering planters actually work?
That consistency can be valuable on a hot, windy balcony, especially for tomatoes, peppers, basil and leafy greens. It also adds water weight and requires an unobstructed overflow. A good setup solves daily drying without creating a sealed, waterlogged pot.
How a self-watering planter works
Most reservoir planters use the same five parts:
- Water reservoir: an enclosed space at the bottom.
- Separator: a perforated platform that holds most of the mix above the water.
- Wicking area: columns of potting mix or a manufactured wick that remain in contact with reservoir water.
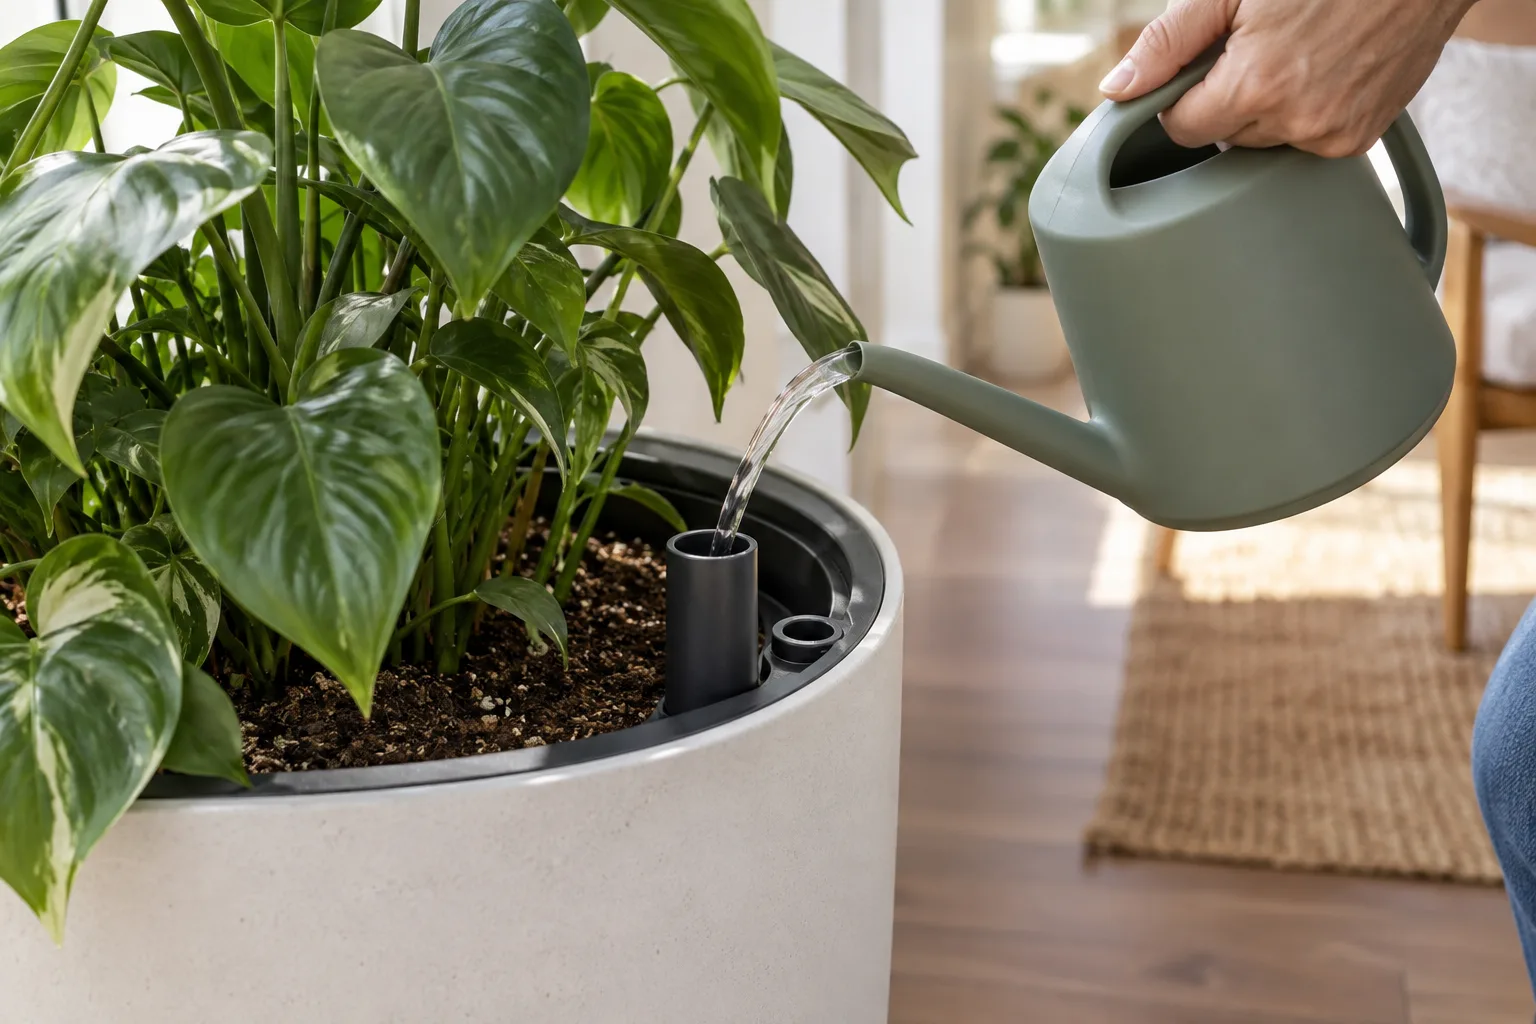
- Fill tube: a path for adding water directly to the reservoir.
- Overflow opening: a side outlet that prevents the water level from rising into the entire root zone.
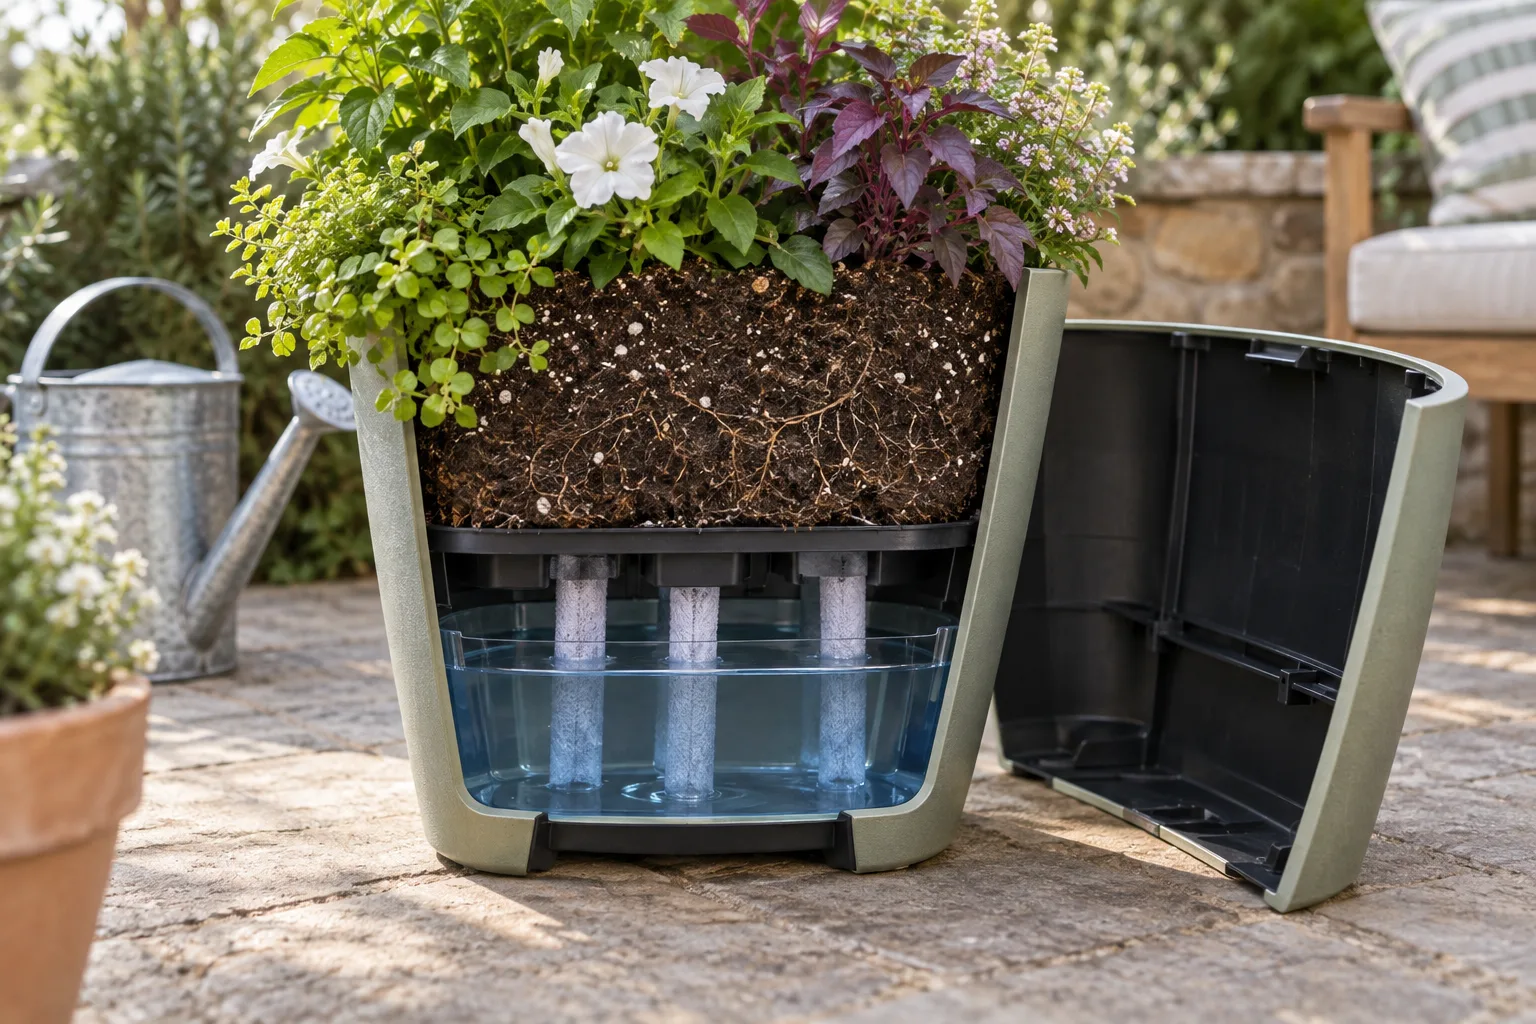
Roots grow through moist mix toward the reservoir. The planter is therefore better described as sub-irrigated than automatic. You still need to check the plant, refill the water and keep the overflow clear.
When a reservoir planter helps
Self-watering containers are most useful for plants that prefer fairly even moisture and use a lot of water during active growth. Good balcony candidates include:
- Compact tomatoes
- Peppers
- Basil and parsley
- Lettuce, chard and other leafy greens
- Strawberries in a system designed for them
- Moisture-loving annual flowers
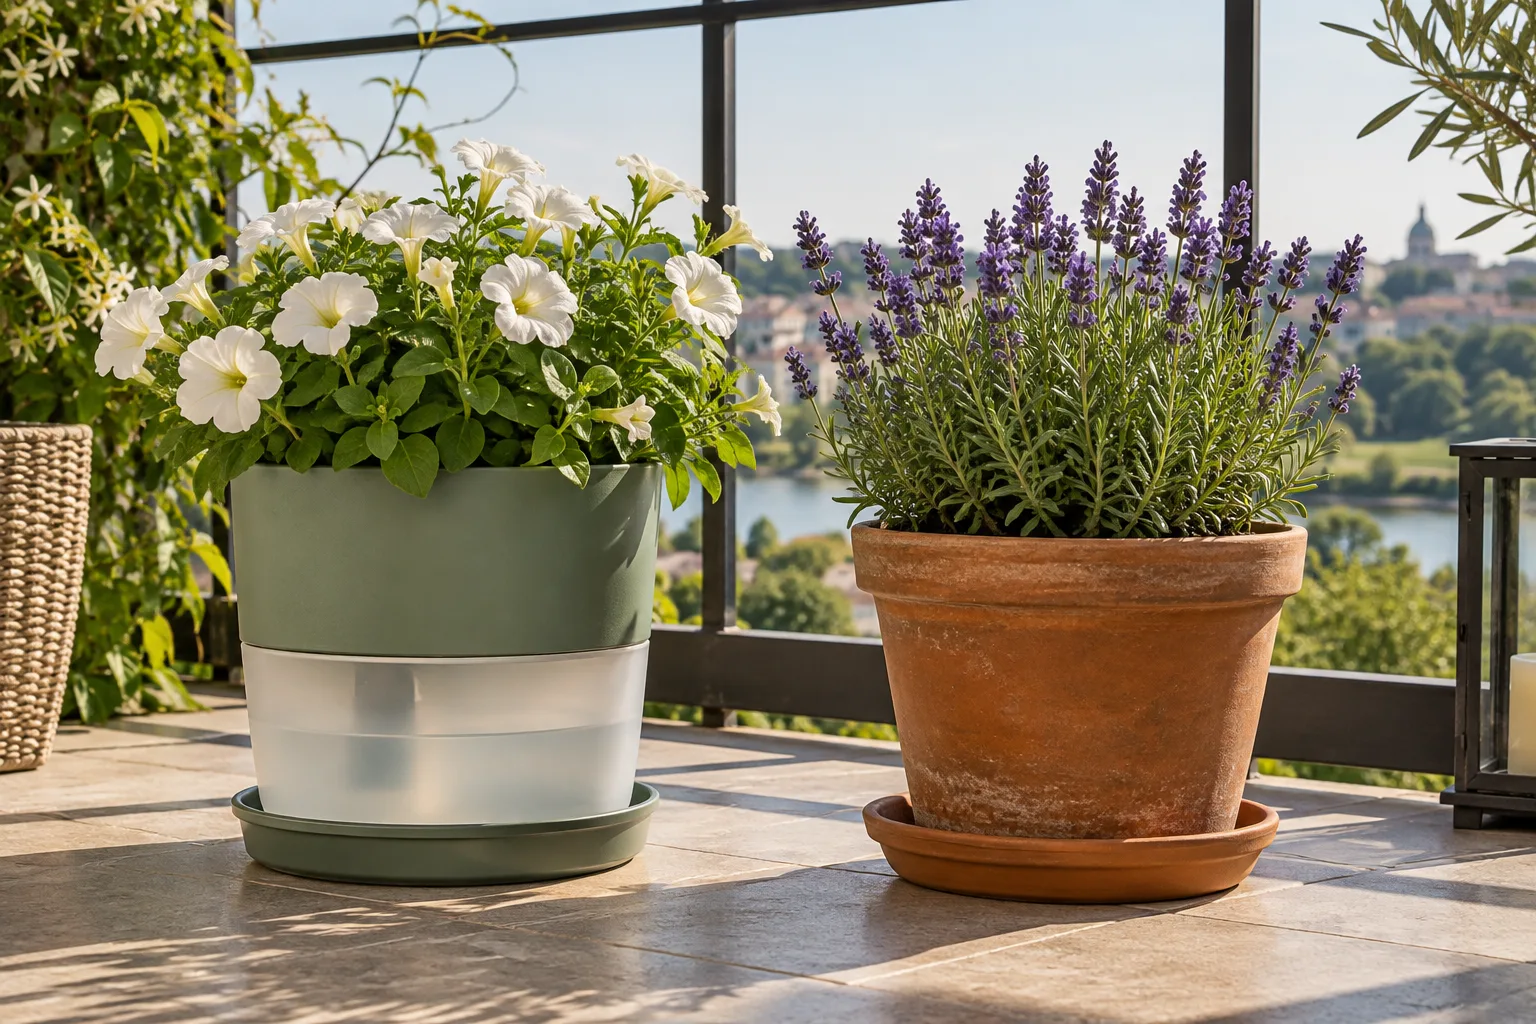
They are less suitable for rosemary, thyme, lavender, succulents and other plants that need the mix to dry more substantially between waterings. Those plants are usually easier to manage in a conventional draining container.
Calculate the water weight before buying
One liter of water weighs approximately one kilogram. A planter with a 10 L reservoir becomes about 10 kg heavier when full, before counting the pot, wet mix and plant. Large reservoir boxes can therefore be much heavier than they appear in a product photo.
Check the reservoir capacity, estimate the complete wet weight and follow your building’s load rules. Keep heavy planters near the building wall, distribute them rather than clustering several together and choose a size you can safely move when empty. The balcony container size guide explains the broader weight trade-offs.
What to look for in a balcony model
- A real overflow: it should be easy to see, reach and keep clear.
- An enclosed reservoir: open standing water can collect debris and provide mosquito access.
- A capped fill tube: this reduces debris and insects entering the reservoir.
- A stable base: broad and low is safer than tall and narrow in balcony wind.
- Opaque walls: light encourages algae in exposed water.
- Removable parts: the indicator, tube and separator should be cleanable at the end of the season.
- Clear instructions: the manufacturer should state reservoir volume and explain initial top watering.
A gauge is convenient but not essential. A transparent indicator can stick or become stained, so confirm the water level occasionally through the fill tube if the design allows. Do not buy a planter merely because it has a decorative red float.
Set it up in the correct order
- Inspect the components. Find the overflow, fill tube and wicking areas before adding mix. Remove any shipping plugs that the instructions identify.
- Place the planter in its final position. It will be much harder to move when the reservoir and mix are wet.
- Moisten the potting mix. Dry peat-based mix can resist water. Blend in enough water that a squeezed handful holds together but does not drip.
- Pack the wicking columns. Fill them firmly enough to maintain contact, without compressing the entire root zone into a solid mass.
- Fill the main planting area. Use a mix intended for containers, leaving a watering lip at the top.
- Plant at the appropriate depth. Install a tomato cage or other support now, before roots fill the container.
- Water from the top first. Thoroughly moisten the root zone after planting. Young roots near the surface cannot use the reservoir immediately.
Continue checking the upper mix and top-watering as needed during establishment. The transition may take a week or several weeks depending on the plant, weather and planter depth. Follow the manufacturer’s instructions for that model.
Refill by plant demand, not by habit
Once roots are established, use the indicator and the feel of the mix together. Refill before a thirsty fruiting crop wilts, but do not keep adding water to a reservoir that remains full after cool or rainy weather. Plant demand changes with temperature, wind, plant size and fruit load.
Many systems benefit from occasionally approaching the low mark before refilling, provided the plant is not allowed to become severely dry. This helps you learn the true refill interval and avoids treating the gauge as a command to keep the reservoir permanently topped up.
Rain makes the overflow essential
On an uncovered balcony, rain enters through the top even when the reservoir is full. The overflow must release that extra water before the entire root zone becomes saturated. Check the opening for roots, potting mix, algae and insects throughout the season.
Position the outlet so it drains into a sufficiently large tray rather than onto the balcony below. Empty the tray after rain. If the planter has a removable rain plug, use it only as directed; never seal the only overflow during wet weather.
Fertilize carefully
Reservoir systems retain water and nutrients differently from freely draining pots. Use the fertilizer method recommended for the planter and crop. Some systems use a measured band of slow-release fertilizer in the upper mix; others permit a dilute liquid feed. More is not better.
Watch for white crust on the mix or planter rim, scorched leaf edges and unexplained decline. These can indicate salt accumulation. If the instructions call for periodic top flushing, do it where the drainage can be captured and disposed of without reaching a neighbor’s balcony.
Prevent mosquitoes and odors
A well-designed reservoir is enclosed. Keep the fill-tube cap in place and replace damaged screens or covers. Do not use a planter that leaves a broad open pool of water accessible to mosquitoes. Empty and clean any exposed saucers at least weekly and after rain. For the evidence behind plant claims and the practical control steps, see whether mosquito-repelling plants work on balconies.
A sour smell, slime around the fill tube or persistently saturated mix suggests stagnant water or poor airflow. Confirm that the overflow is open, stop refilling and follow the manufacturer’s cleaning instructions. If roots have rotted, the plant may need to be removed rather than rescued with fertilizer.
Common self-watering planter problems
| Symptom | Likely issue | First check |
|---|---|---|
| Upper mix stays dry after planting | Roots have not reached the wicking zone | Top-water during establishment |
| Plant wilts with water in reservoir | Poor wick contact, root damage or heat stress | Check mix moisture below the surface |
| Leaves yellow and mix is wet | Overflow blocked or reservoir kept too full | Clear the overflow and pause refilling |
| Gauge never changes | Float is stuck or stained | Remove and clean it if the model permits |
| Water appears on balcony floor | Tray too small, outlet misdirected or planter cracked | Empty, inspect and reposition before refilling |
Clean it before winter or storage
At the end of the season, empty the reservoir and remove dead roots and old mix according to local disposal rules. Wash removable parts with mild soap and water, rinse them and let everything dry. Stored water can freeze and damage a planter, while old roots can block the overflow next season.
If you are choosing a first crop, the balcony salsa garden is a practical use for one large reservoir planter: put the compact tomato in it and grow the pepper and herbs separately. For general watering technique, see the site’s guide to starting a balcony garden.
Check the rest of the watering setup
Confirm the filled size and weight in the container guide. For heat exposure, use the hot-balcony watering notes.
Use the reservoir as a check-in, not a reason to stop looking
A self-watering planter reduces the swing between soaked and bone-dry soil, but it does not make every plant low-maintenance. Check the reservoir at a regular interval that matches your weather: perhaps twice a week in mild conditions and more often during a hot or windy spell. Fill through the designated tube or opening, then let the indicator and the plant’s condition guide the next refill instead of topping up automatically every day.
Keep the overflow path clear. A reservoir that cannot drain after heavy rain can leave roots sitting in water, so place the planter where runoff will not trouble a neighbor or collect against the building. If the pot has a removable insert, look underneath at the beginning of the season to make sure soil has not dropped into the water chamber and blocked the wick or intake.
Not every plant wants the same moisture. Leafy greens, basil, and many annual flowers often benefit from the steadier supply. Mediterranean herbs, succulents, and plants that prefer to dry between waterings may need a different container or a lighter refill schedule. The goal is stable root moisture for the plant you chose, not a permanently full reservoir.
Sources
- University of Maryland Extension: Self-watering containers
- University of Maryland Extension: Growing vegetables in containers
- University of Minnesota Extension: Fertilizing and watering container plants
- CDC: Preventing mosquito breeding in water-holding containers
Always follow the instructions for your specific planter. Reservoir volume adds substantial weight, and building rules take priority over general gardening advice.