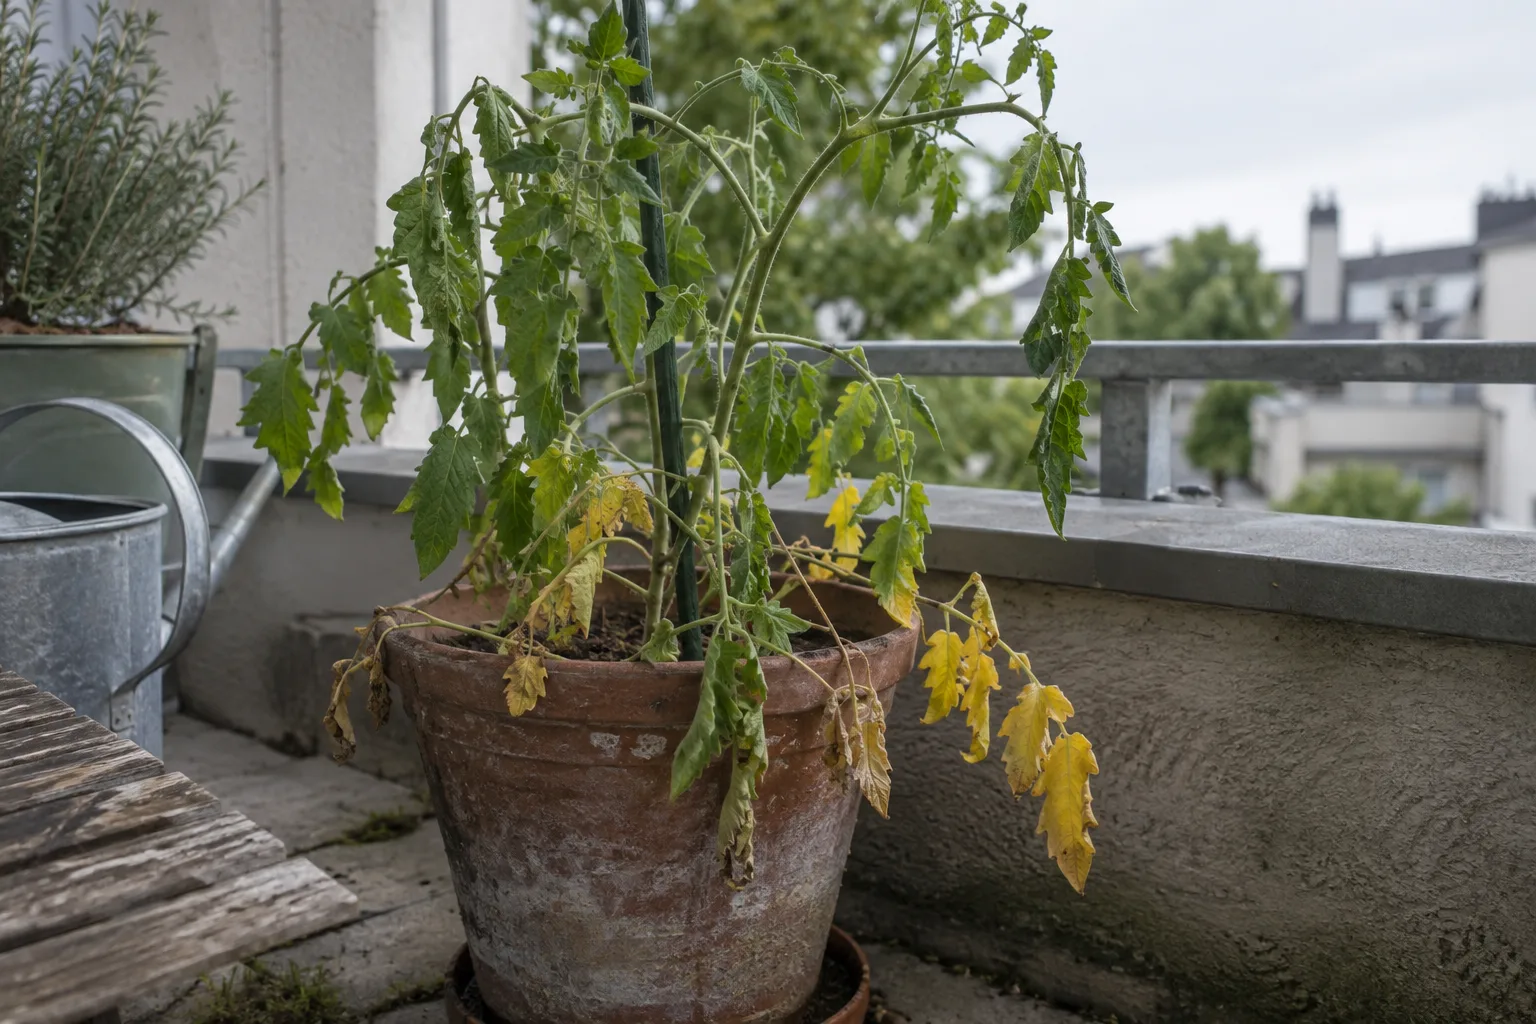
A struggling plant rarely tells you exactly what’s wrong; it mostly just looks unhappy in a handful of overlapping ways, yellowing, wilting, dropping leaves, that different problems all produce. Guessing at a fix and simply hoping it works wastes time the plant, especially a small container plant with limited reserves to draw on, often doesn’t have. Working through a short, ordered checklist instead gets you to the real underlying cause faster than jumping straight to the first thing that comes to mind, which for most people is usually just water, one way or the other.
This is that checklist, in the order worth checking things, from most common cause to least, and it’s saved more than a few favorite pots from an early trip to the compost bin.
Step 0: One plant or several, and is this actually normal right now?
Before working through the checklist below, two quick questions narrow the field faster than any single symptom does. First: is it just this one plant, or are several plants on the balcony showing the same thing at the same time? A single struggling plant points toward something specific to it, its pot, its position, a pest that found it first. Several unrelated species declining together at once points away from a plant-specific cause and toward something shared: a bad batch of potting mix, a fertilizer applied too heavy across the board, a stretch of extreme heat or a cold snap, or tap water that’s suddenly different, from a building’s seasonal pipe flush, for example. Chasing an individual diagnosis on five plants that are really reacting to one shared cause wastes time the actual fix doesn’t need.
Second: is what you’re seeing actually abnormal for the plant and the season, or is it the plant doing something entirely expected? A deciduous or herbaceous perennial dying back to the ground in fall is dormancy, not decline, and it will return on its own in spring; forcing more water or fertilizer onto a plant that’s correctly shutting down for winter doesn’t help and can do real harm. A few of the very oldest, lowest leaves yellowing and dropping on an otherwise healthy, actively growing plant is normal turnover, not a problem to solve. If a quick check of the species confirms the behavior you’re seeing lines up with a known seasonal pattern, the rest of this checklist may not even be needed.
Step 1: Check the soil moisture directly
Push a finger two inches into the soil, don’t just look at the surface, which dries out faster than the root zone and can mislead you either direction. Wet, heavy, and dark soil down at root depth points toward overwatering; bone-dry, pulling-away-from-the-pot-edge soil points toward underwatering. This single check resolves a large share of “why is my plant dying” cases almost immediately, since watering problems, in one direction or the other, are the single most common cause of a struggling container plant by a fairly wide margin over everything else on this list.
Step 2: Look at the roots if you can
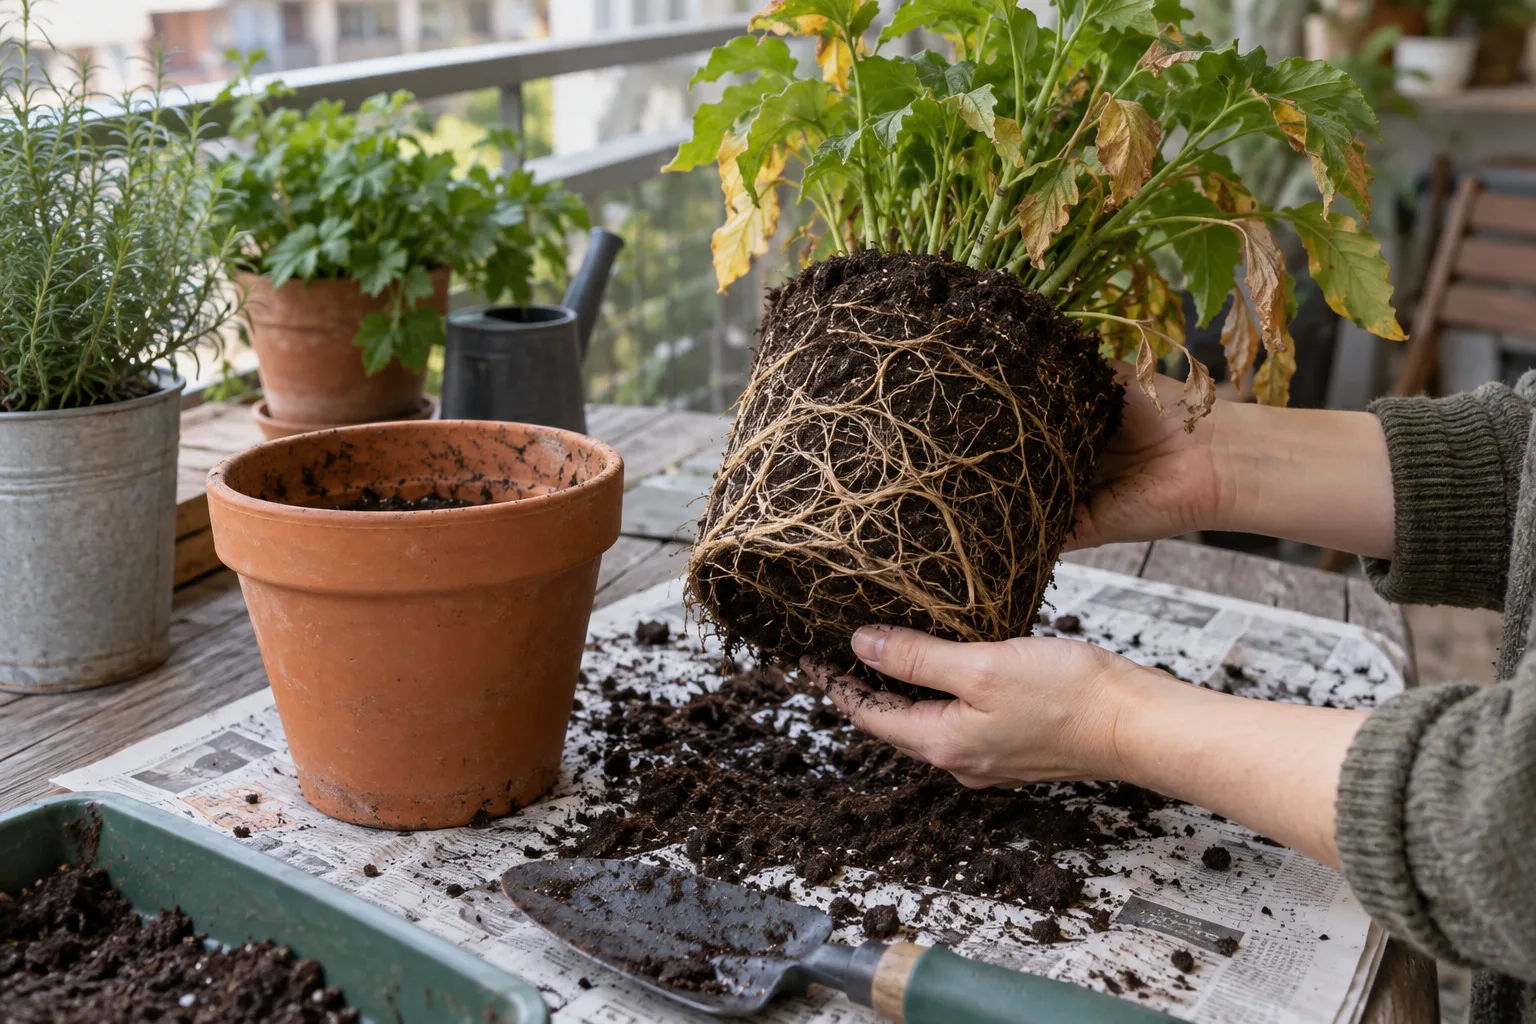
If the soil check is ambiguous, or the plant is small enough to check easily, gently slide it out of its pot and look at the roots directly. Healthy roots are typically firm and pale, sometimes white, sometimes tan depending on the species; roots that are dark, mushy, and falling apart when touched indicate rot, almost always caused by overwatering or a container with truly poor drainage. Roots that are dry, brittle, and sparse suggest chronic underwatering or a container that’s simply too small for the plant. A tightly circling mass of roots with little visible soil left means the plant is root-bound and needs repotting, covered in our guide to repotting a balcony plant.
Step 3: Check the light against what the plant really needs
A sun-loving plant placed in a shaded spot will grow leggy, stretched, and sparse as it reaches for more light; a shade-loving plant in harsh direct sun will show scorched, bleached, or crispy patches on leaves facing the strongest exposure. If the plant’s symptoms match a light mismatch and the spot truly doesn’t provide what the plant needs, no amount of adjusting watering or feeding fixes it; the plant needs to move to a better spot, or you need a different plant suited to the spot it’s already in. Our guides to plants for hot, sunny balconies and plants for shady balconies help match plant to spot if a move is the answer.
Step 4: Check for pests
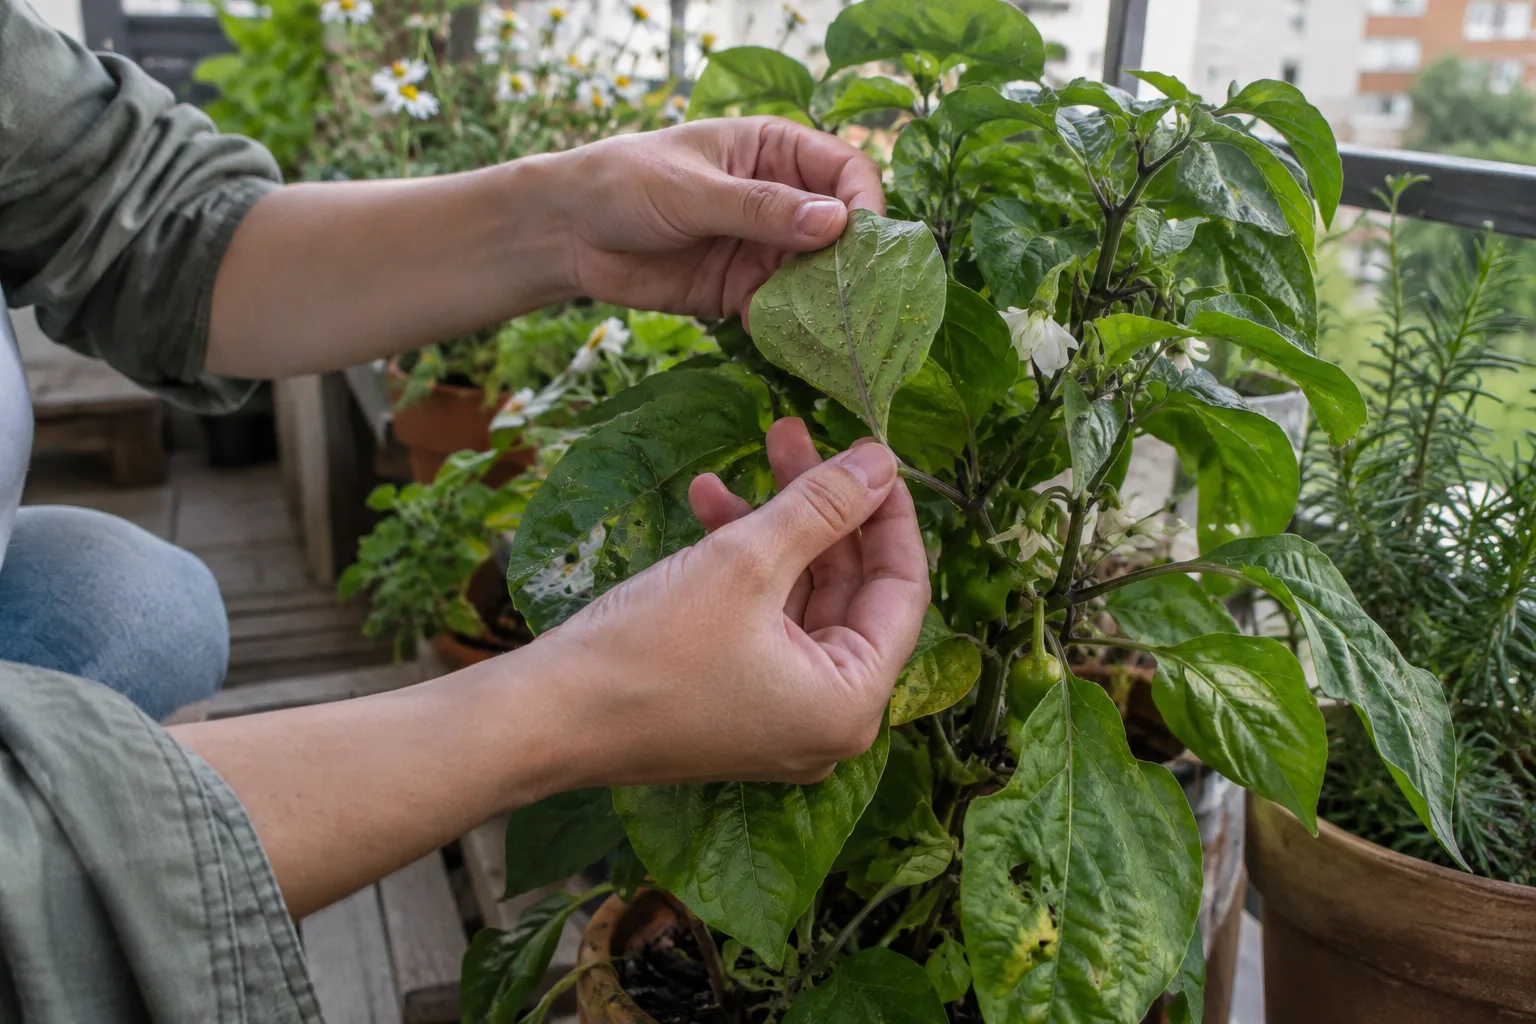
Turn leaves over and check stems closely, especially where new growth meets older growth. Small, soft-bodied clusters gathered on new growth, sticky residue coating leaves, fine webbing between stems, or visible chewing damage along leaf edges all point toward a pest problem, not a watering, light, or soil issue. Our guide to removing aphids from balcony plants covers one of the most common culprits specifically, but the general principle holds for other pests too: a plant declining despite correct watering and light often has an insect problem that’s easy to miss unless you look closely at the undersides of leaves.
Step 5: Consider the container itself
A pot with no drainage hole, a decorative outer pot trapping water in its base, or a container that’s simply too small for the plant’s current size can all produce symptoms that look identical to a watering mistake even when your actual watering habits are fine. Confirm the container has real, working drainage, and that nothing is quietly collecting in a saucer or a decorative outer sleeve underneath it, before concluding the problem is purely about how much or how often you happen to be watering.
Step 5.5: Check for disease, not just pests
Pests and disease get lumped together, but they look and behave differently, and it’s worth telling them apart. Fungal issues tend to show up as spots with defined edges, a powdery white or gray coating on leaves, or a general soft rot spreading from one point, not insect damage’s scattered bite marks or visible bugs. Disease problems are also more tied to conditions than pest problems are: poor air circulation, water sitting on leaves overnight, and overcrowded plants with no space between them all encourage fungal issues specifically. If several plants in a tightly packed group are showing similar spotting or a powdery coating at the same time, crowding and airflow are worth checking alongside anything more specific to one individual plant.
Step 6: Rule out a recent change
A plant that was fine last week and is suddenly struggling this week is often reacting to something that changed recently: a repotting, a move to a new spot, a sudden heat wave or cold snap, or a fertilizer application. Transplant and environmental stress typically shows up within days and resolves within a week or two on its own once the plant adjusts, which is a very different situation from a chronic problem that’s been building for weeks. If you can identify a recent change that lines up closely with when the symptoms first started, patience is often the real fix here, instead of reaching for any further active intervention on top of what already happened.
Step 7: Only now, consider nutrients
Genuine nutrient deficiency is real but comes last on this list deliberately, since it’s the cause most often assumed first and confirmed least. Uniform pale or yellowish color across the whole plant, combined with slow but otherwise normal-looking growth, and none of the more common causes above checking out, is when nutrient deficiency becomes the more likely explanation. Our guide to fertilizing balcony container plants covers correcting a real deficiency without swinging into the overfeeding problems that come from treating every symptom as a feeding problem by default.
Keeping a simple record helps more than you’d expect
A quick note, even just a phone photo with a date, each time you water, feed, repot, or move a plant turns “it’s been struggling for a while” into a real timeline you can work backward from. Without that record, it’s surprisingly hard to remember whether the yellowing started before or after you moved a plant to a new spot, or whether the feeding schedule changed around the same time symptoms began. This doesn’t need to be elaborate; a note in your phone’s notes app with the date and what you did is enough to make the “rule out a recent change” step in this checklist properly reliable instead of a guess about your own memory.
Symptom quick-reference
| What you see | Most likely cause |
|---|---|
| Yellow, soft, drooping leaves; wet soil | Overwatering |
| Brown, crispy leaf edges; dry soil | Underwatering |
| Leggy, stretched growth reaching one direction | Not enough light |
| Scorched or bleached patches on sun-facing leaves | Too much direct light for the species |
| Sticky residue, tiny visible insects, webbing | Pest infestation |
| Sudden decline right after a change | Transplant or environmental stress |
| Roots circling densely, fast drying pot | Root-bound, needs repotting |
When to just let it go
Not every declining plant is worth extensive troubleshooting. If a cheap annual is clearly finishing its natural life cycle at the expected end of the season, that’s not a diagnosis problem, it’s just the plant doing what annuals do. And if a plant has lost the large majority of its root system to rot, or shows heavy pest or disease damage across most of its structure, the more realistic path is often replacing it outright instead of nursing along a plant that’s truly unlikely to recover back to full health, no matter how correctly you diagnose the original cause at this point.
Why guessing usually backfires
The most common diagnostic mistake is reaching for water, or more water, as the default first response to almost any symptom, since watering feels like the most obviously caring thing to do for a plant that looks unwell. But wilting, yellowing, and general decline can result from both too much and too little water, along with several other, entirely unrelated causes, and adding more water to an already overwatered plant makes the real underlying problem measurably worse, not better, which is exactly backwards from the intended, caring response. Running through the steps above, starting with a proper soil check instead of a guess, avoids that specific trap.